▶️ You can find our tutorial about the capture tool on our Youtube channel.
The Agilitest capture tool is an essential component for selecting user interface elements to capture and reuse them in tests as action targets.
What is the capture tool?
During a manual or automated test, it is essential to define the target of each action programmed in the scenario. For example, a click action requires a target element to interact with so that the test clicks on the right button, or the right interface element.
The Agilitest capture tool defines these action targets. It goes a long way in identifying the components of your applications, to set up detection rules tailored with the relevant attributes.
The capture tool allows to fly over the GUI elements of your web, mobile, desktop, or data structures (XML for your SOAP webservices, JSON for your REST webservices).
For each element thus overflown, the capture tool presents you the tree in which it is located, and the attributes which it has.
What is the DOM?
It's the same capture tool that allows you to capture the HTML tags of the DOM (Document Object Model) of your web applications, the Widgets of your desktop or mobile applications, or a graphical presentation of the data structures of your webservices.
In this sense, the Agilitest capture tool is graphic, versatile, and at the service of the multichannel aspect.
The DOM is an HTML representation of a web page, which defines the structuring of the different components of the page.
The DOM can be seen as a tree where each element can have zero or more children, which can themselves have zero or more children.
Example : The DOM always starts from a root element: the <html> tag. This tag has children (<head>; <body>) which therefore have <html> in common as a parent. The content of your <body> tag can notably contain links, buttons, blocks etc.…
💡 Tip
To better understand HTML:
- Opening tag <>, closing tag </>
- Element, parent, child element and sibling element
- Processing a component of <iframe> type
- An <input> tag implies a parent <form> tag (often rich in attributes)
- A <li> tag implies a parent <ol> or <up> tag (often attribute-rich)
-
How to open the capture tool
To open the capture tool, you must first start a channel and have the website open as part of a web test
Once you have created your project and opened your channel, you can open the capture tool by clicking on the corresponding button in the channel management menu.
.png)
The capture filter is symbolized by a pattern in the form of small crosses that are positioned in front of the channel (the screen of the application to be tested). This filter is used to delimit the capture area.
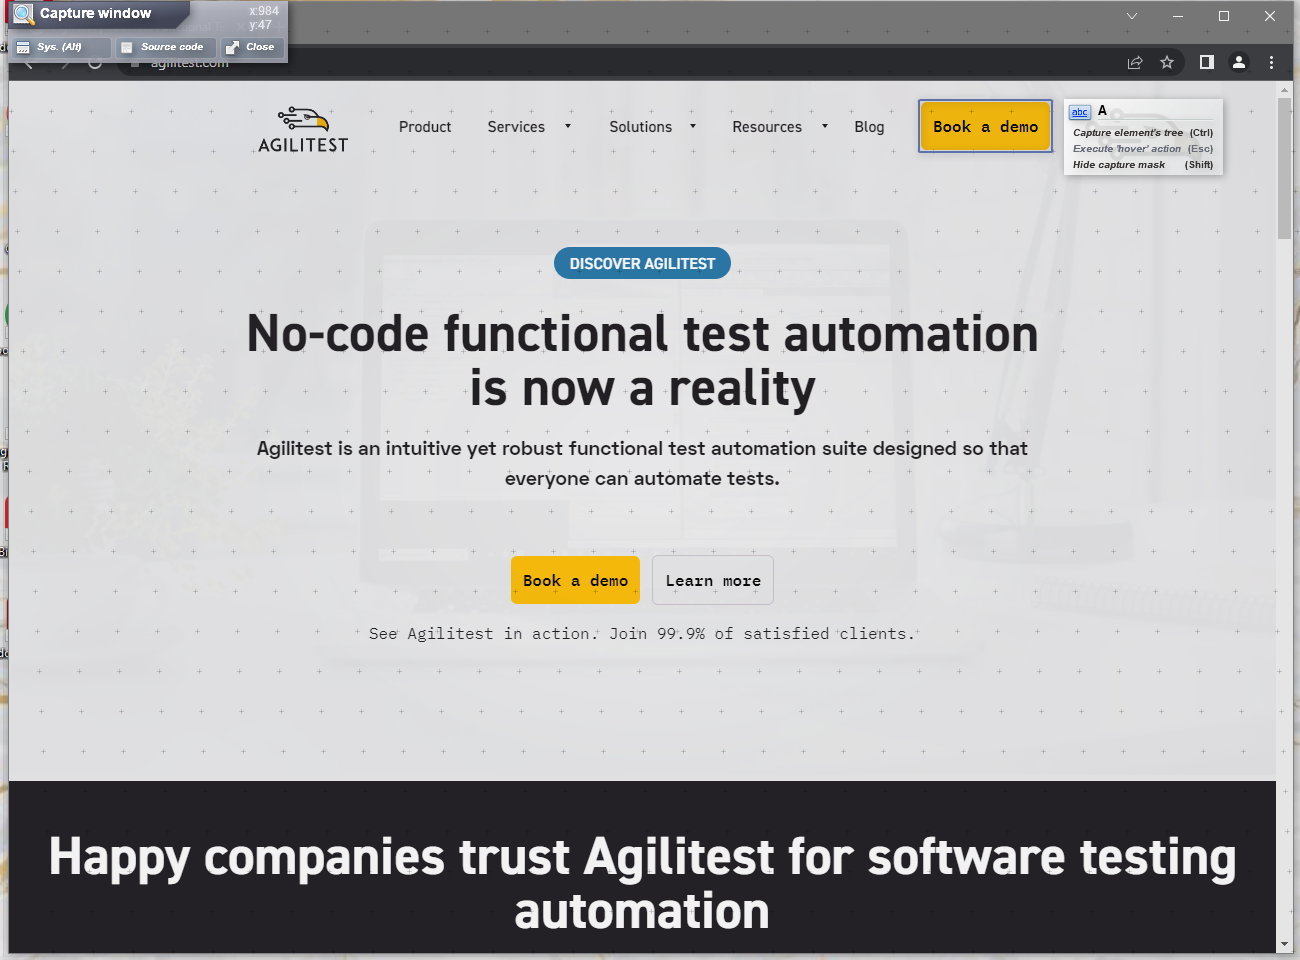
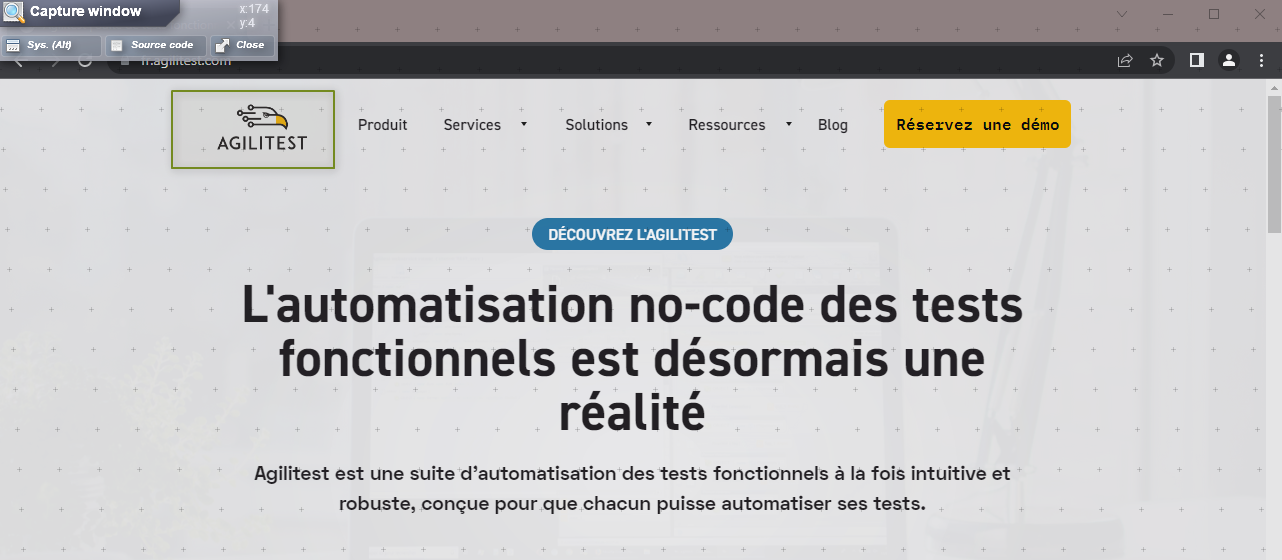
Another indicator that the capture tool is activated is the Capture window that appears at the top on the left.
.png)
You can press the Shift key on your keyboard to click on elements on the web page without having to close the capture tool. This will open a drop-down menu or show other elements that don’t necessarily appear.
🔶 Warning
The pattern corresponds to the initial size of the channel that is set in its ATS configuration. If the channel is manually resized, some times the syncronisation with the channel will work and the filter will match the modified channel size. However, in other cases, the filter will not match the channel size because it will be out of sync with the channel driver. It will therefore be necessary to close the channel and then to open it again for the driver to synchronize again.
Use of the capture
The Agilitest capture tool consists of a "capture window".
.png)
This window can be moved from left to right, especially when it hides an element that interests you.
This capture window is composed of 3 main buttons:
- System (Alt): Toggles between HTML capture mode and system capture mode. By default the capture tool will be placed on the HTML view. To change the view you can click on the system button or press the ALT key on your keyboard. Changing the capture mode requires the capture tool to reload, which may take a few seconds.
- Source Code: Displays the source code of the page.
- Close: Disables the capture mode.
- The coordinates x and y: correspond to the coordinates (x: abscissa and y: ordinate) of the cursor.
The movement of the mouse over each element of your application is accompanied by a tooltip specifying its type (either the name of the HTML tag for the web, or the name of the GUI component for the desktop).
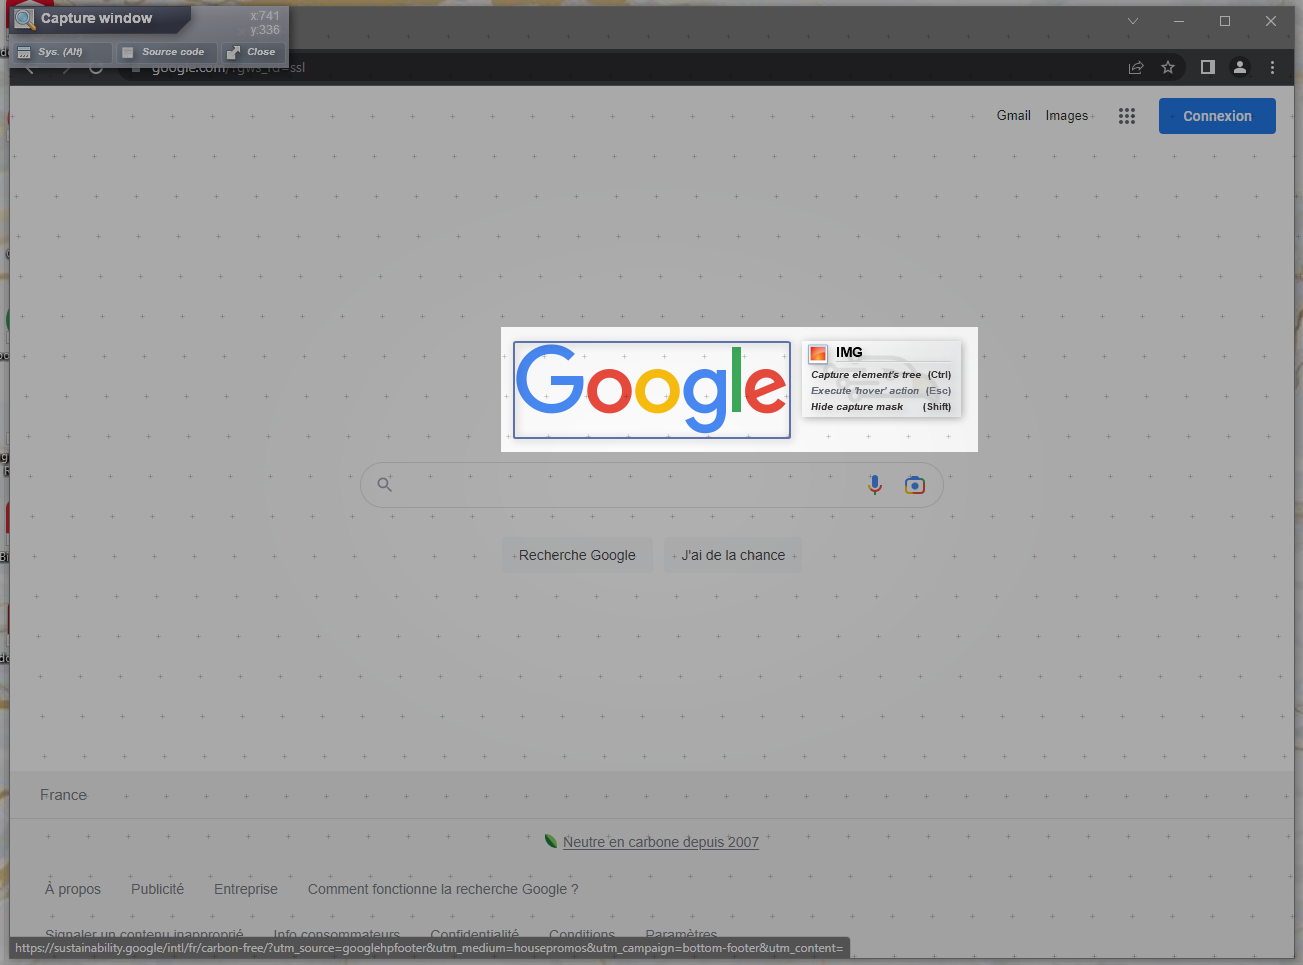
To capture an item, you need to hover your mouse over the desired item, then press the CTRL key on your keyboard. You don't need to click on the mouse, just press the CTRL key.
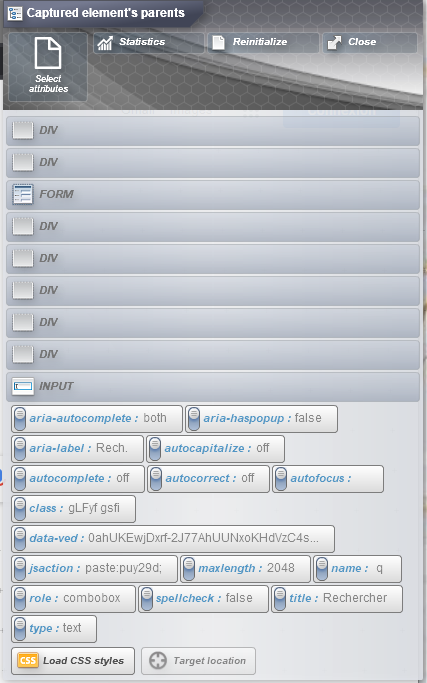
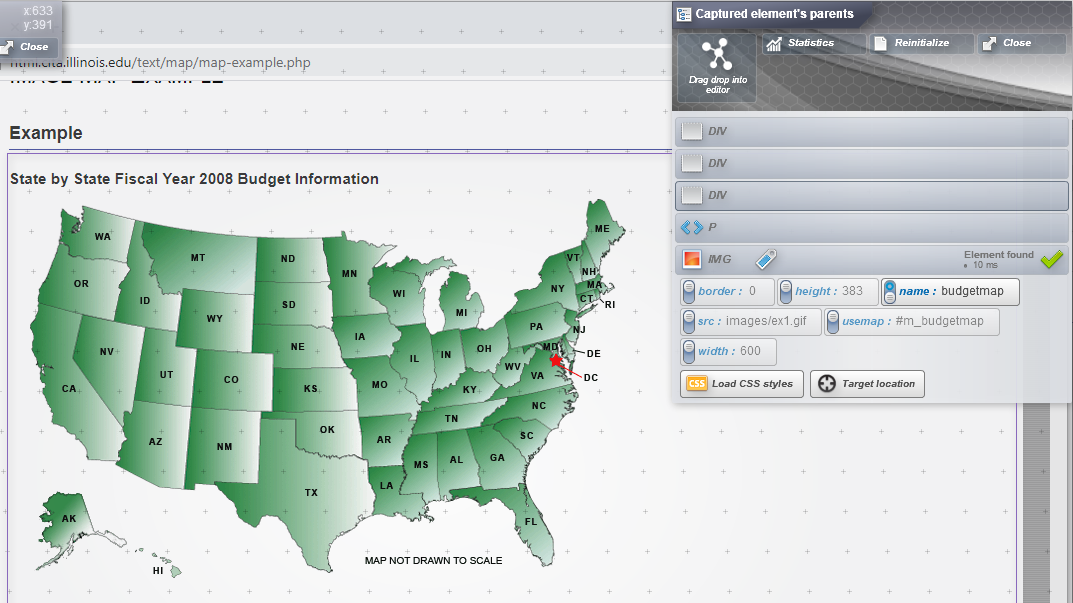
This will bring up the "Captured element's parents" window that displays the path from the root of the application to the item that was just targeted.

The parent elements unfold like an accordion to display more details of the attributes. The attributes must be checked according to what you want to keep to perform the detection of the element.
As the mouse moves through the different "nodes" of the path, the blue frame around your element in the web page will position itself to identify the element you have moved.

The component is displayed with all the attributes that define it. The objective is to select one or more attributes that will define the component and make it uniquely recognized within the page. This is called a "Locator".
The attributes
.png)
The attributes are: type, class, id, name, or even CSS attributes for web applications. Or they can be: TitleBar, Button, TabItem for desktop applications.
Agilitest only proposes the attributes it finds. This means that it does not invent ids, it takes them from the DOM.
If there is no id proposed, it means that the application is developed as is. Two possible situations:
- The developers have not developed any id, perhaps because of Agile development or a lack of time. You can therefore give them a report on your test and tell them if any ids are missing. As a QA, your role is also to audit good practices and quality in a broad sense. As a functional tester, it is more common sense to point out to the developers that it takes you time that is not necessary to identify this or that component when an id would be a time saver in the configuration of your tests.
- Conversely, if you use development frameworks, some frameworks do not have "good practices" that are respected and therefore do not have an id.
Warning about ”text” attributes
In the context of classic test automation, it's not necessarily good practice to use the text attribute, however, if it's not possible to do otherwise or your text will not change then it's not a problem.
Here are some reasons why the "text" attribute might be problematic:
- Recognition of the element no longer works in the multilingual context of your solution.
- Some browsers are case-sensitive (and others not), so a capital letter tends to reduce the robustness and portability of your test.
- The handling of line breaks and/or spaces may differ from one browser to another.
Once you've selected the "text" attribute, you can click on it to automatically edit values with useful regular expressions to avoid these latter problems.
ShadowDom
Shadow DOM (Shadow Document Object Model) is used to avoid style conflicts and to isolate the component code, which is particularly useful during the development of complex user interface. Agilitest uses the ShadowRoot, which is a component of the ShadowDom technology, during its elements research in order to sharpen this research and to make your scripts more precise.
.png)
Agilitest automatically detect the capture of an element with the ShadowRoot type in the capture window. You will be able to recognize those elements with their pictograms and their dotted frame.
The ShadowRoot components that compose the captured element will appear in the interface element of the action.
.png)
You will also have the possibility to manage your elements and declare those in ShadowRoot directly in the action editor.
.png)
Identify iFrames elements
Some HTML pages include iFrames (i.e. inline frames) in their design, notably to insert elements from another server into the page.
To find elements on these HTML pages, you will need to select each iFrame in the page DOM, otherwise you won't be able to find the children of that IFRAME on the page.
Example:
Select the iFrame attribute that allows you to recognize it.
.png)
Select the attributes of the children you wish to automatically find in this iFrame.
.png)
The object is then easily recognized.
Advanced features in the locator
Once the attributes to define your component are selected, several steps can be performed before placing your interface element within the script by adding a corresponding action.
Statistics on the captured element
In the "Captured element’s parents" window, the Statistics button allows you to check whether the checked attributes will uniquely recognize the item on the page.
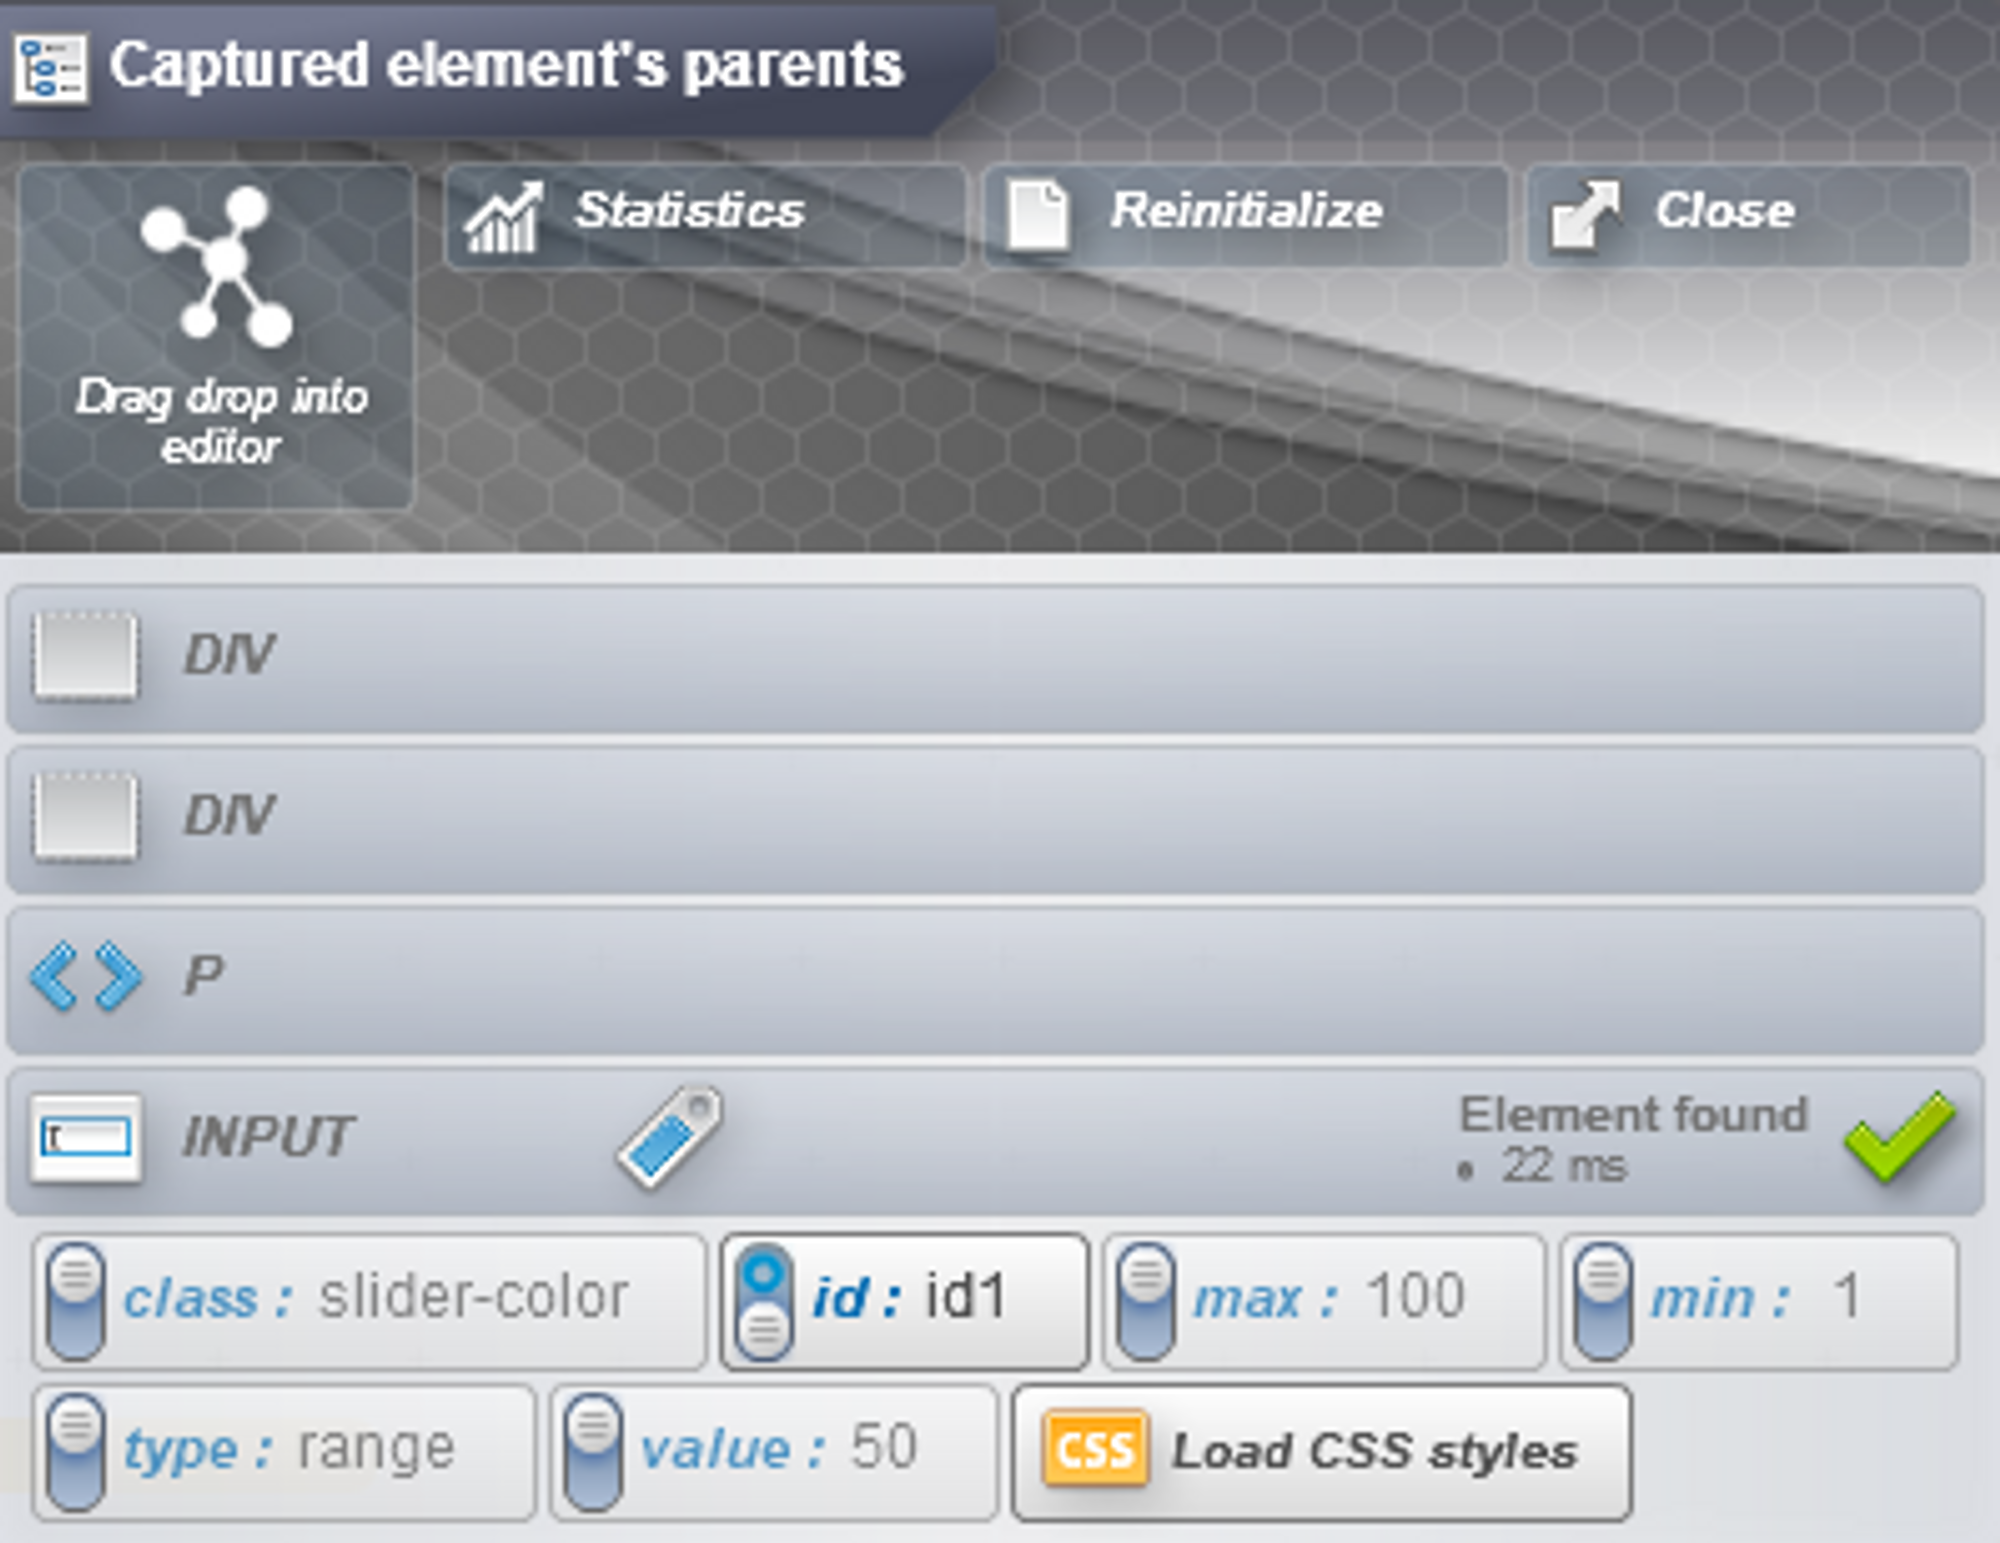
Clicking on the "Statistics" button confirms or denies the uniqueness of the checked element according to the chosen detection rule. A green tick will appear to confirm the uniqueness of the element. It is possible to click on the magnifying glass from the green tick to highlight the element on the web page.
If the green check mark does not appear when checking the statistics, there are several possibilities:
- Multiple occurrences: A warning will appear to indicate multiple occurrences on the page. In this case, you can add precision and go up in the upper elements by adding attributes to your element or, if several occurrences appear, it is possible to target the occurrence that interests you from its index number.Example: If an image always appears as the 2nd occurrence in the order of the components on the page, then you can select the 2nd occurrence among those indicated..
- A red cross: This means that the element is not found. You will have to find another way to recognize the component.
Regular expressions (regex)
Regular expressions can be used in the Agilitest capture tool to match parts of attributes. The regular expression allows you to manage dynamic data.
A search based on long text is not recommended, as blank spaces and line breaks can lead to errors.
Example: Some JavaScript libraries are known to randomize parts of ids or classes. If we look at an id written "btn-XYhSj02-01". We assume that the first part "btn" is fixed and the second part "01" as well, only the middle part is likely to vary.
We can then match this identifier with this regular expression:
btn -.{7}-01
.png)
The use of regular expressions brings an additional layer of difficulty, but their use allows to simply handle the most delicate cases. The difficulty associated with regular expressions is therefore a lesser evil.
When you click on the text of an attribute it will open the insert allowing the setting of regular expression.
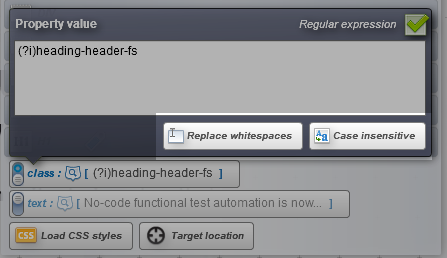
Access to two buttons for :
- Manage case
- Manage spaces
💡 Tip
Expressions to remember:
(?i) : Means that the expression is completely case insensitive
(?s): Insensitive to the formatting of special characters (line breaks, spaces, etc)
.*: To form any character string. The dot represents all possible characters (A-Z, 0-9 and special characters) and the star indicates that the previous pattern (i.e. the dot) is repeated n times.
[a-z]{3} : Means 3 letters between a to z.
Drop the element in the script
The "drag and drop" icon in the parent window of the captured item allows you to use this detection rule in the item of an Agilitest action.
The drag and drop can be placed either after the last lines of the test, which will create an action,
.png)
Either inside an existing action line in the "Interface element" section.
.png)
Once the element has been dropped into an action in your script, you can highlight the element in your application to see exactly which object it corresponds to.
To do this, when your channel is open, click on the button with the magnifying glass icon to highlight the element in your application.
.png)
Search for an element by its index
When a locator allows you to find several elements, it is possible to specify by an index which one you want to manipulate.
Example: In an array where the number of rows is represented by the element "TR", if you specify index #2 in this element containing several occurrences, then the text of the second row of the array will be retrieved.
From the editor, fill in the index of a multiple element by clicking on the Lego icon.
%20(1)%20(1).png)
Then, to the right of the element, you will see a # and two up/down controls that identify by an index the element defined by your locator.
%20(1).png)
By validating, Agilitest allows you to retrieve specific attributes of an item identified by its index.
Graphic recognition of elements
Graphical recognition is possible with Agilitest, it allows to detect the presence of an element on the application and to count the number of occurrences (PCRE format). While it is not desirable to abandon the HTML attribute capture system, graphical recognition is complementary in specific use cases.
Example: When the desired element has no usable id or class, graphic recognition is usable.
When the application includes Java, Flash or 3D code, the capture tool will not always be able to dive into the application tree to present the different elements of the interface in a structured way. In this case, graphical recognition allows actions or controls to be performed even in the presence of a programming framework that is not cooperative with Agilitest.
To use graphic recognition, open the capture tool. Instead of positioning on a component and pressing the CTRL key, to perform a graphic capture you need to select the area you want to capture.
Using the mouse, hold down your left click to select the area to capture
The selection will take an image capture of the element with 3 buttons available:
- Elements Tree
- Copy
- Save

Click on "Elements Tree" to associate the location with the graphic capture then drag the element into your script and add an action to it. The possibilities are the same as for a classic HTML component.
🔶 Warning
This tool should be used sparingly; it may be useful to act on a button that is not recognized, for example, but it may interfere with graphic recognition.
Target an element
In some particular cases, it is mandatory to do an operation on a very particular position on the tested software where the locator can not be used since it is only based on attributes.
Example :
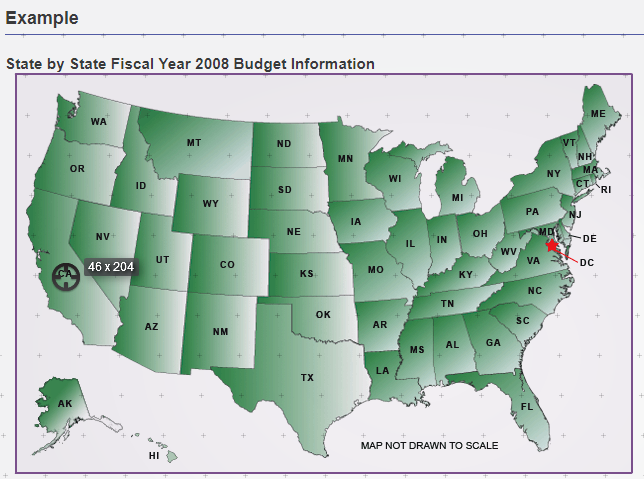
When you want to click on a precise zone on an image where the last element visible by the locator would capture a bigger zone than wanted.
Like a web image of a map where you want to click on a city rather than a country, or a intern component of a desktop app, etc…
Agilitest offers a solution that allows a precise definition of the point on which you want to execute actions by specifying its cartesian coordinates in relation to the window’s component.
In the example below,

If you only want to click on California, but the last element visible in the HTML structure is the full image of the United States, then you will need to create a cartesian coordinate for the locator.
A cartesian coordinate definition of the locator is done in two steps:
- Select the reference component
Start by selecting the standard locator, either by its attributes of by its graphic recogntion
- Target the action point
Once the locator is selected, click on the “Target location” button
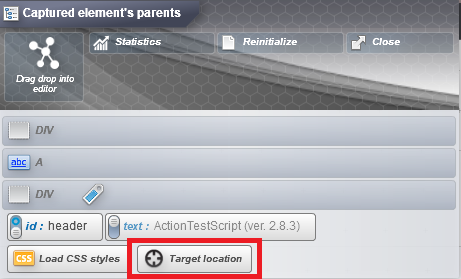
You can then target precisely the point on which the action is to be exectued by clicking directly on it.
Agilitest will inform you that a locator with a cartesian target has been created by adding a target on the drag and drop button

Once you have dropped your locator in the editor, Agilitest will generate an action with cartesian coordinates.

Thanks to this functionnality, you will be able to generate a locator out of the select component.
Eventual problem with an overflown element
In order not to be intrusive with the software being tested, Agilitest will not deploy a plugin on browsers, which means that it will appear superimposed on the windows of the application being tested.
In some cases, this can cause display delays between the two applications, particularly when component selection boxes are displayed.
If, in the capture mode, Agilitest is not perfectly aligned on the page on which you want to capture elements,
Then, verifiy that your Windows system has not modified automatically the size of texts, apps and other items displayed on each of your screens. This parameter needs to be set to 100% in order for the Agilitest capture tool to work properly.
To open the display menu, do a right click on your desktop interface and select “Display settings”.
.png)
Define the text to100%.
The interest of such a tool
Using the source code in another way
The Agilitest capture tool offers interests compared to the development tools panel offered by browsers with the F12 key that gives access to the source code of a Web page:
- The Agilitest capture tool is cross-browser: Chrome, Firefox, IE, Edge, Opera are treated the same way;
- The Agilitest capture tool is multi-channel and can be used on: web applications, webservices, desktop applications, mobile applications;
- The Agilitest capture tool does not just hover over elements, it refines the detection rules and tests their uniqueness on the application screen;
- The Agilitest capture tool offers graphical element recognition** in addition to HTML attribute recognition.
Locator Agilitest vs. XPaths
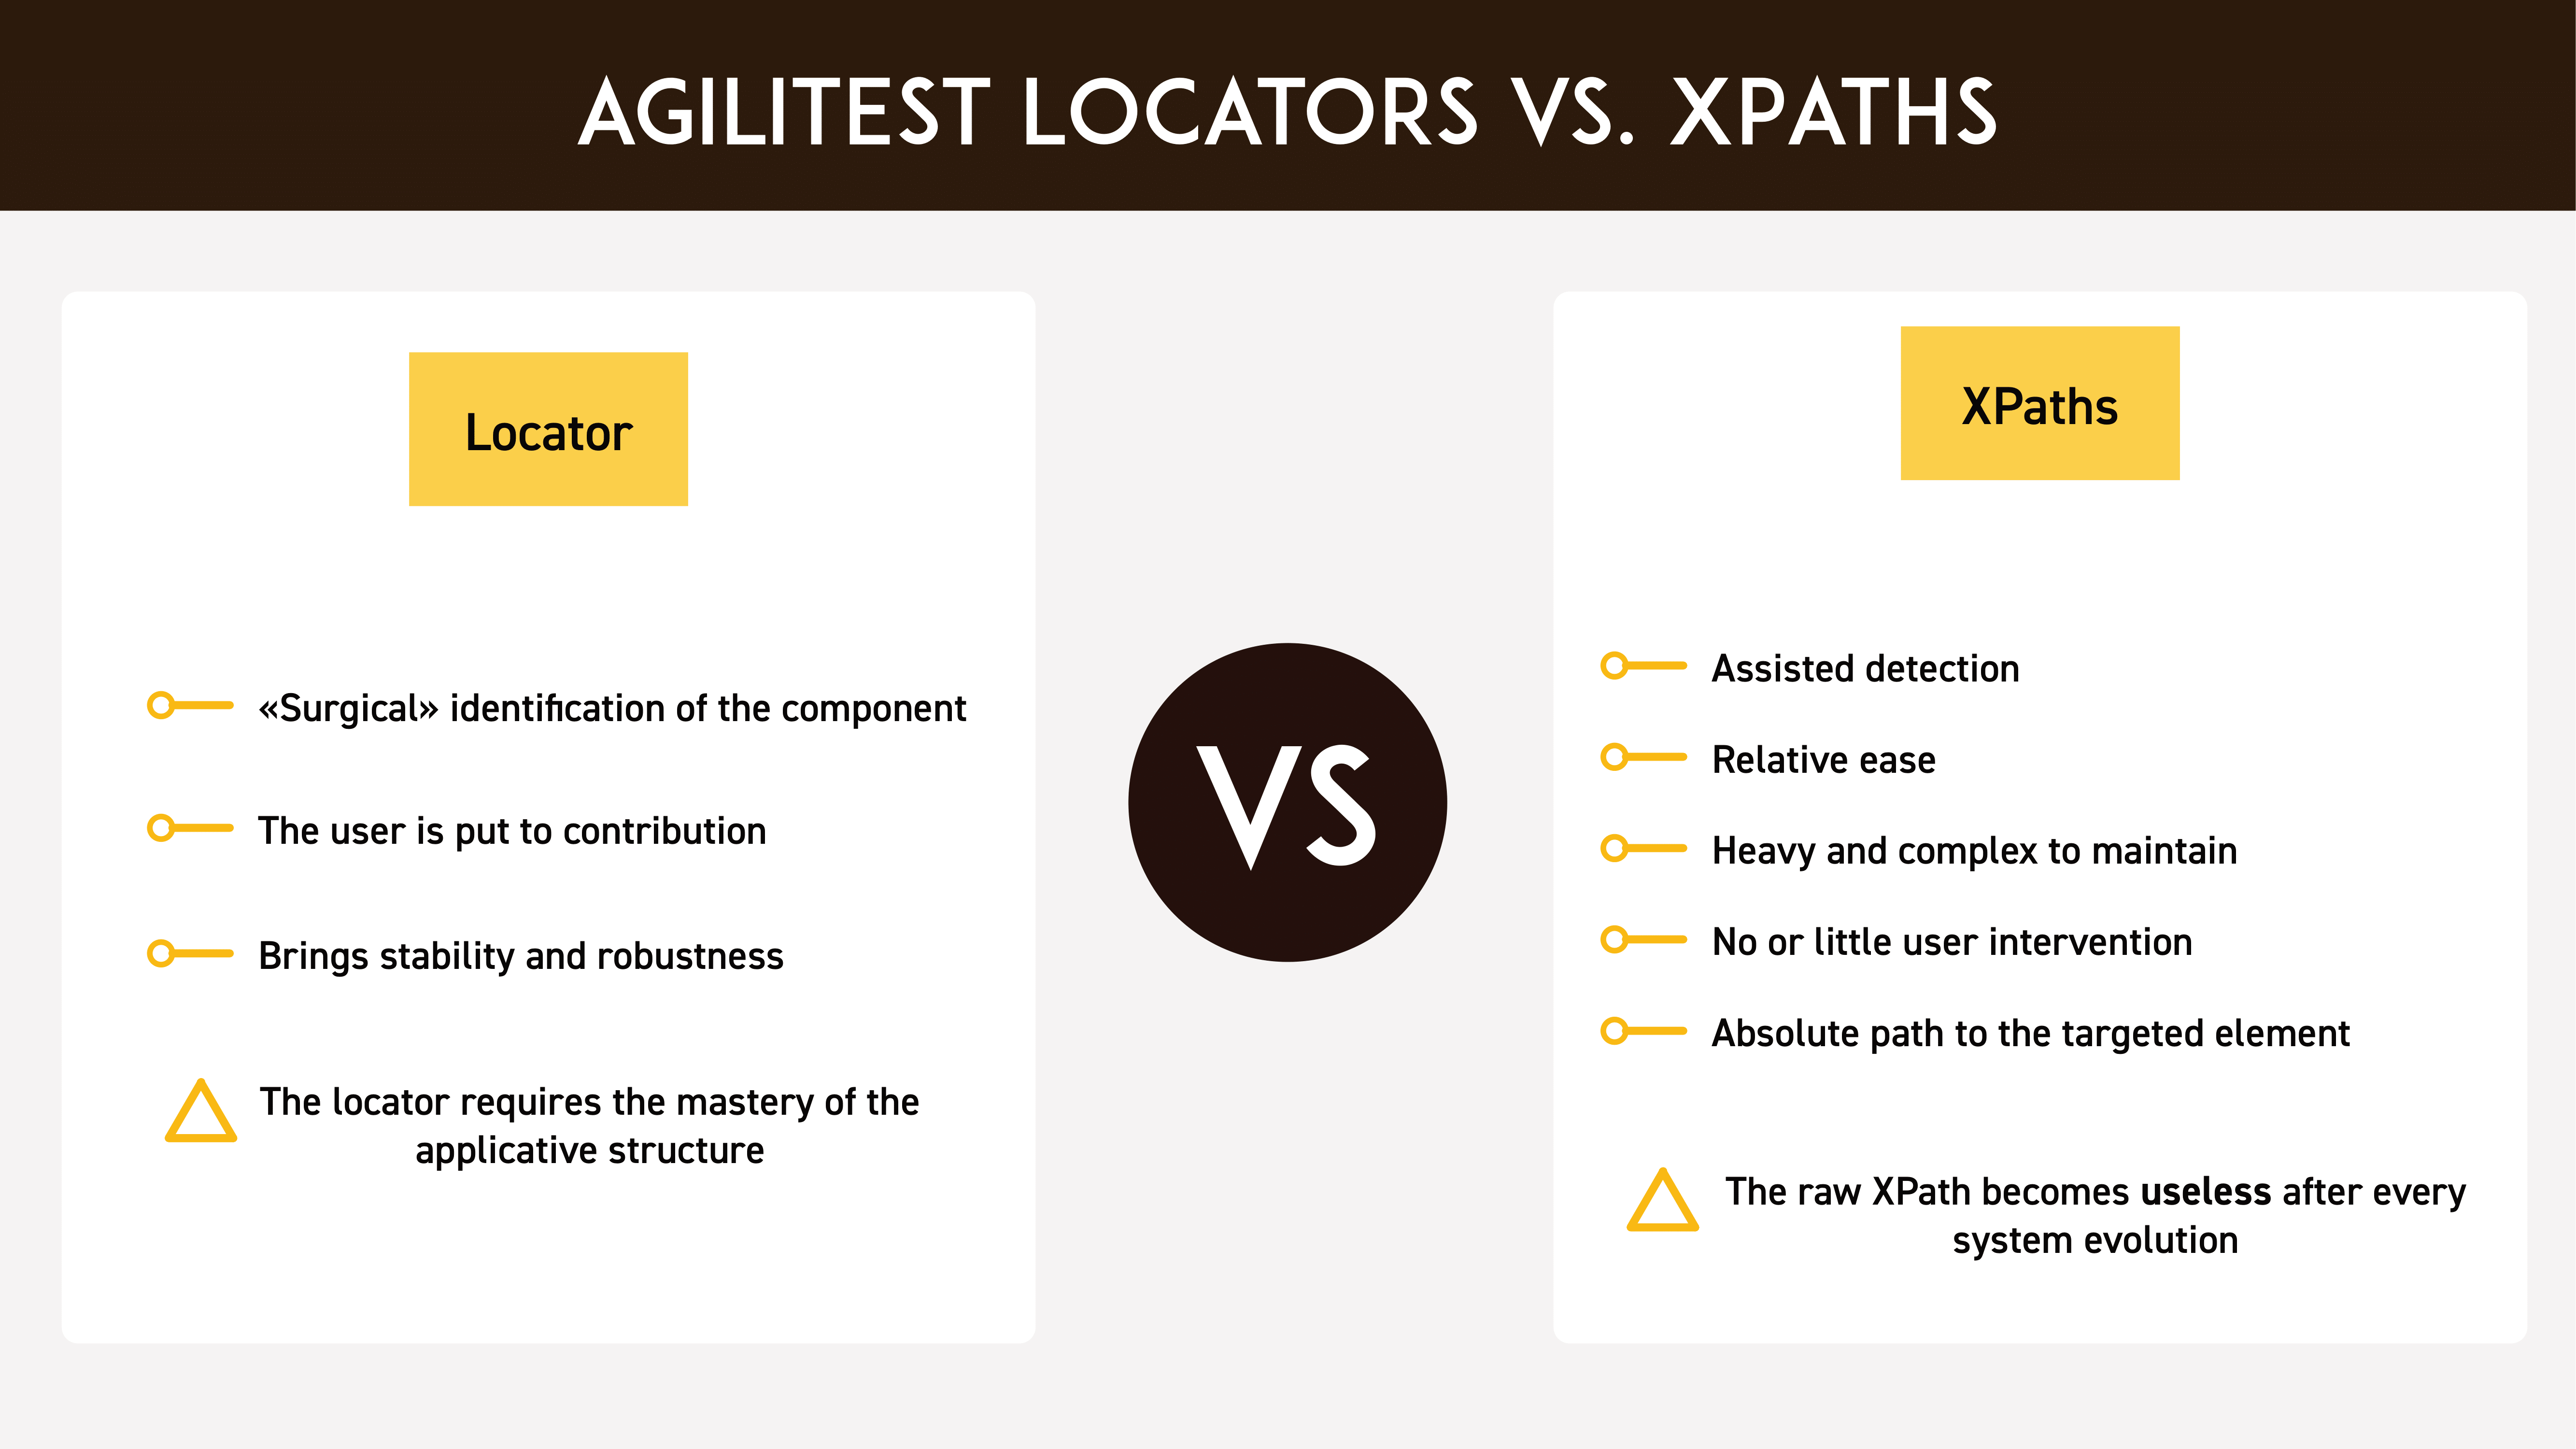
Many testing software applications use XPath as a system for querying and detecting elements in an application.
Detection is often assisted, and allows relative ease in creating an XPath expression. The XPath expression is created and used, often without the tester having had the opportunity to read and review it in the context of their knowledge of the application.
A recorder allows, when activated, to open a browser and to perform actions on it (clicks, data entry, etc) which will then be transformed into a script by the recorder.
The capture tool has the same purpose, only the typing is manual.
One of the advantages of the Xpath is the "absolute" side of the path, which allows to find exactly the component thanks to the detail of the indicated path.
However, if an element changes within this path, it will result in a wrong indication to the component. This is especially true with Javascript frameworks (like ExtJS) that randomize element ids making them difficult to use.
Example: If the developers add an IVD within the path or have rearranged the components, the attribute used to recognize the IVD has evolved.
Also, automatically generated XPath expressions can be cumbersome to maintain.
Agilitest offers the opposite:
The idea is to slow down the recognition of the component as much as possible. The fewer components you add, the less likely you are to make the test obsolete to future changes, which makes the test more robust.
These are, in our opinion, two reasons not to use XPath technology in Agilitest:
- No automatically generated XPath expressions without review by the automation engineer or functional tester.
- No systematic KO testing after the application is updated.