Git repository for Jenkins builds
In this guide, we will explain how to use a project from a Git repository as an Agilitest project source for running Jenkins jobs. With each build, Jenkins will first perform the Clone of the Git repository, and then proceed to run the ATS scripts configured in the test suite, and then generate any reports.
For the purpose of this guide, the Git repository is hosted at Bitbucket and has been initialized with a new empty Agilitest project by following the steps in the documentation Setting up a Bitbucket-hosted Git repository for Agilitest projects.
Then, the Agilitest project (here, repository-test) lived on through commits, with the accumulation of ATS scripts, test suites, and data files.
Creating the Jenkins job
The Jenkins server must be started and connected to Agilitest from the Tools menu. It can be a local Jenkins server installed by Agilitest, or a remote server managed by your administrator.
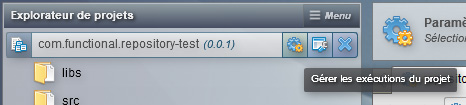
It is then time to create a new Jenkins job from the Agilitest run menu (by clicking on the "Manage project's execution suites" button in the "Projects explorer" accordion zone).
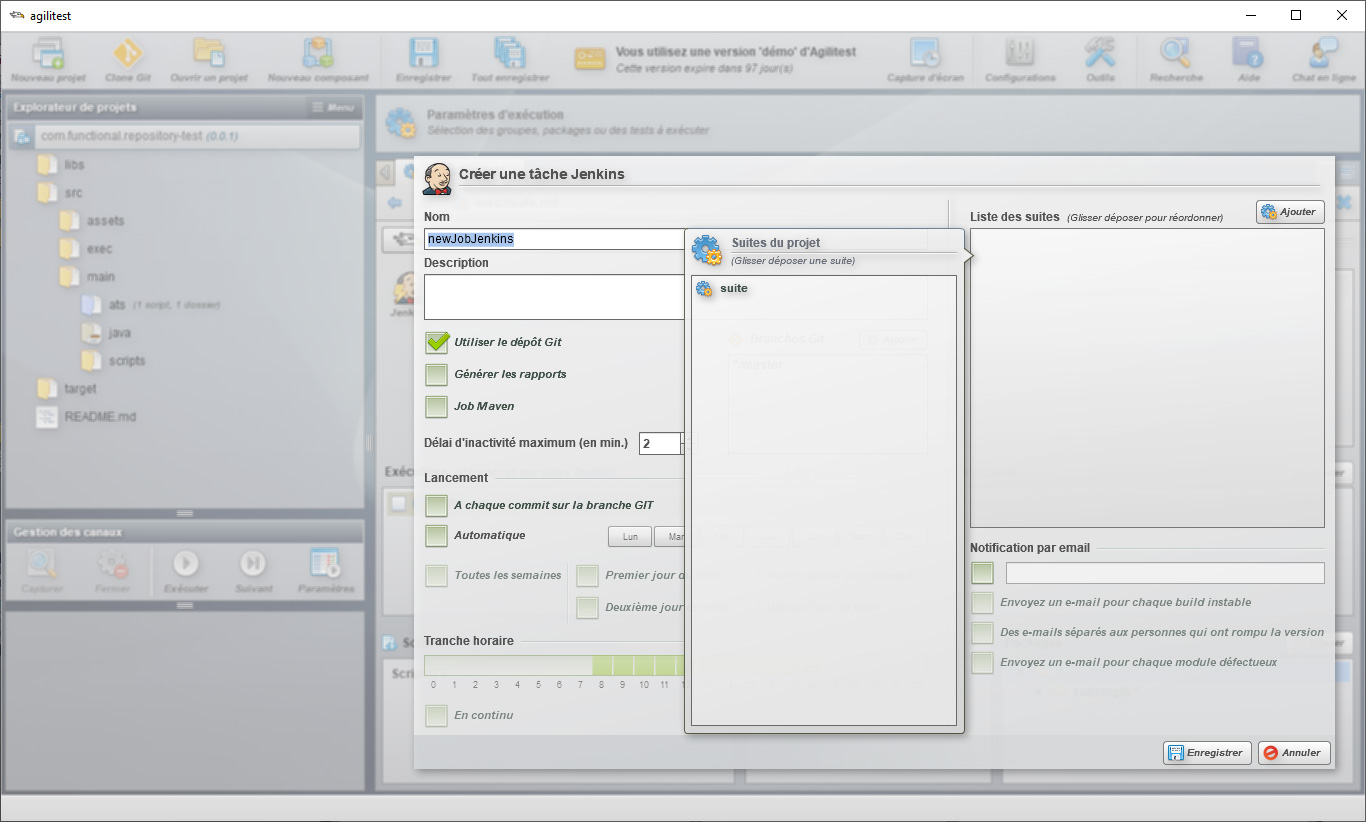
Then switch to "Jenkins integration" mode and click on "Create a new task". Note that Agilitest has already recognized the presence of a Git repository in the project folder with its hidden .git subfolder. In our example we leave the */master branch by default. Then we drag and drop the desired test suite into the "Suites List" area.
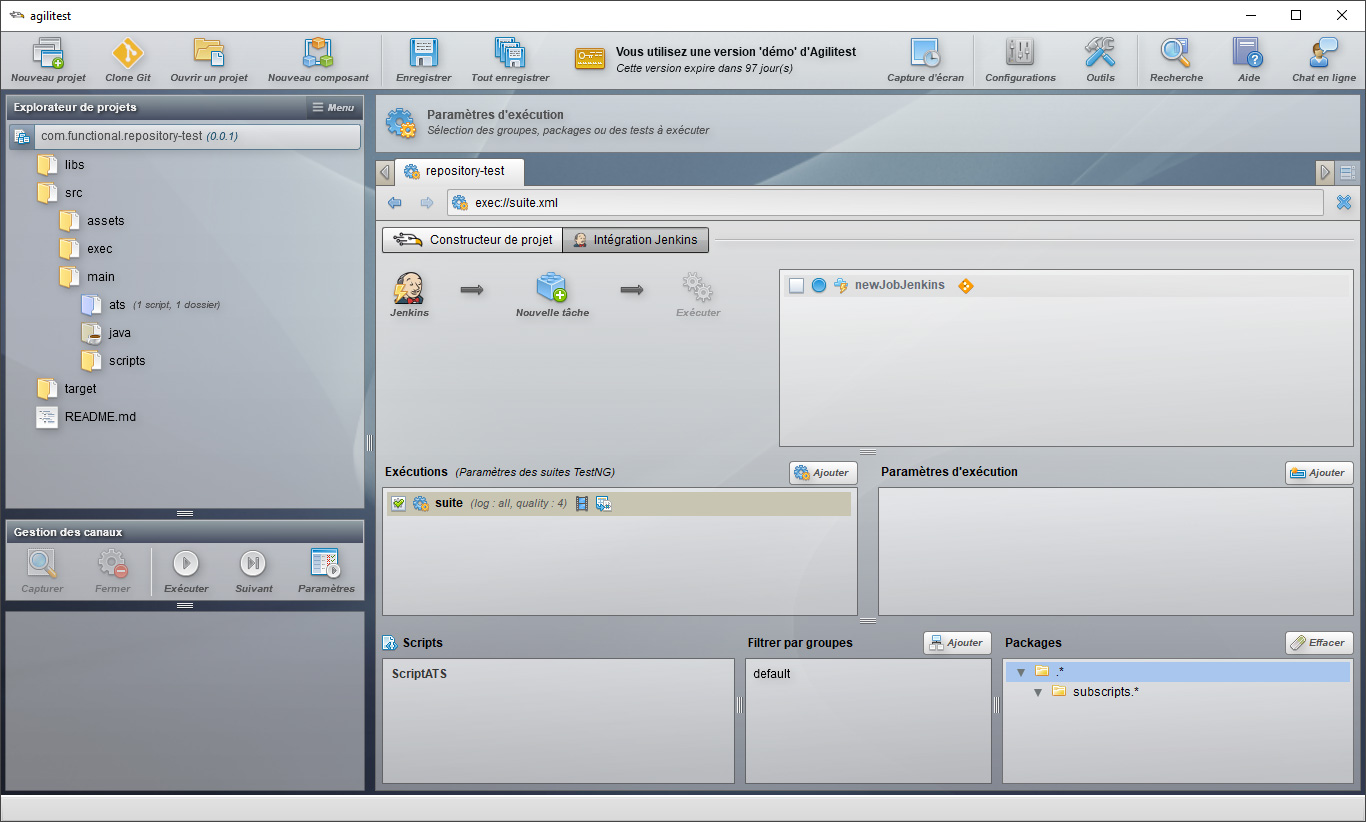
After validation, the new Jenkins job appears in Agilitest like this.
Before launching the build, it is essential to prepare the Agilitest project to support the Push and Fetch operations that will be performed by the Git client and the Jenkins server respectively. Git's default operation is not to synchronise empty folders, yet some of them are essential to Agilitest. A workaround is to drop an empty .gitkeep file in each empty folder of the Agilitest project. These files will force Git to synchronise the (empty) folders that contain them.
- ./target/ats-output/.gitkeep
- ./target/classes/assets/resources/lang/.gitkeep
- ./target/classes/assets/resources/certs/.gitkeep
- ./target/classes/assets/resources/images/.gitkeep
- ./target/classes/assets/data/.gitkeep
- ./target/report/.gitkeep
- ./libs/.gitkeep
- ./src/main/java/.gitkeep
- ./src/main/scripts/.gitkeep
- ./src/main/ats/subscripts/.gitkeep
- ./src/assets/data/.gitkeep
- ./src/assets/resources/lang/.gitkeep
- ./src/assets/resources/certs/.gitkeep
- ./src/assets/resources/images/.gitkeep
Configuring Jenkins
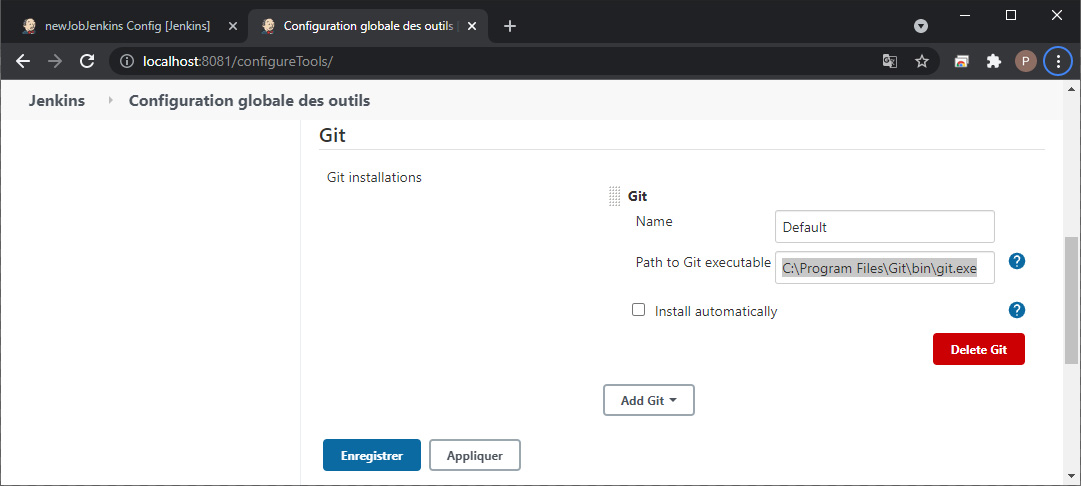
First, the machine running Jenkins must have Git installed. The Jenkins server must have the Git plugin. Then the git.exe executable must be configured in the Jenkins Manage Jenkins > Global Tool Configuration > Git > Path to Git executable. In this case we have set C:\Program Files\Git\bin\git.exe.
Let's take a look at what the newly created Jenkins job in the test repository project looks like from the web back office.
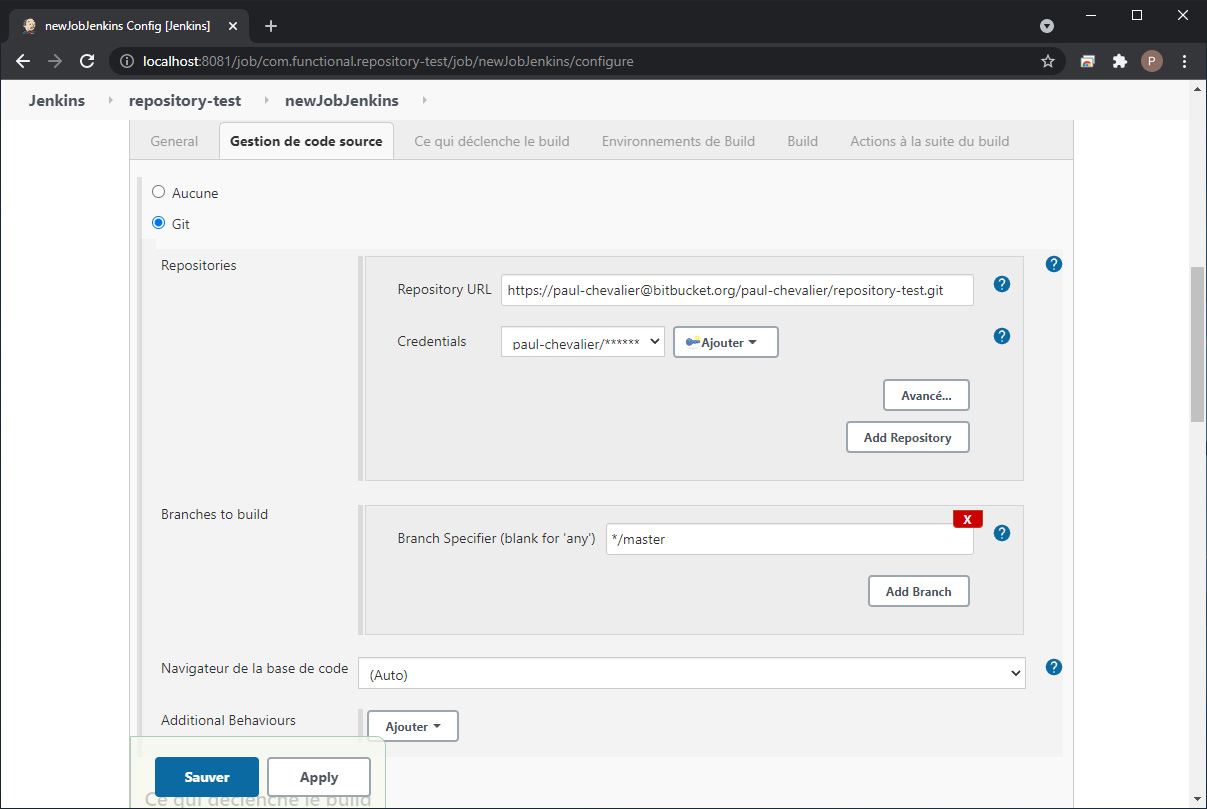
The URL to the Git repository is recognized. It is important to configure authentication to the Git repository in Jenkins. Here we used a Bitbucket account (paul-chevalier) and an API token created from the "App passwords" menu in the Bitbucket administration interface.
One can initialize the Git repository in SourceTree with the syntax https://paul-chevalier:my-app-password@bitbucket.org/paul-chevalier/repository-test.git. The app password figures into the URL so in this case, configuring the Credentials in Jenkins is not required. To do that, SourceTree may require to address the System git.exe instead of Embedded gitlib.
Launching a build
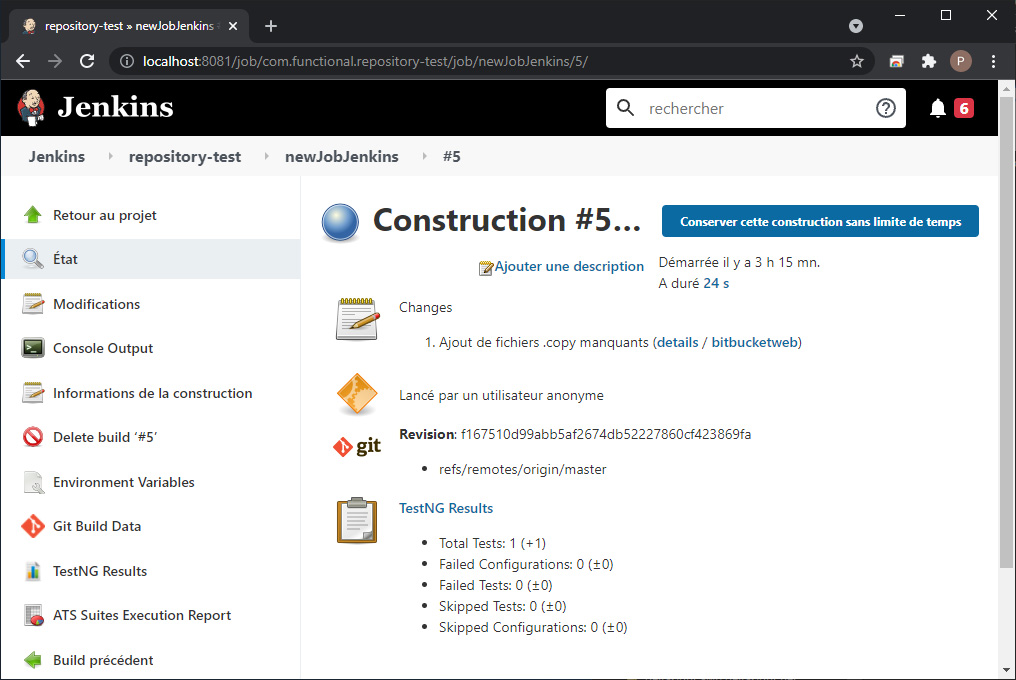
When launching a build on the Jenkins job thus configured, you can follow the Clone operation of the Git repository orchestrated by Jenkins in the standard output (Console Output icon). The name of the last commit appears here.
Building in workspace
C:\Users\paulc\.agilitest\work\jenkins\workspace\job\com.functional.repository-test\newJobJenkins
[…]
Fetching changes from the remote Git repository
>C:\Program Files\Git\bin\git.exe config remote.origin.url https://paul-chevalier@bitbucket.org/paul-chevalier/repository-test.git # timeout=10
Fetching upstream changes from https://paul-chevalier@bitbucket.org/paul-chevalier/repository-test.git
[…]
>C:\Program Files\Git\bin\git.exe fetch --tags --force --progress -- https://paul-chevalier@bitbucket.org/paul-chevalier/repository-test.git +refs/heads/*:refs/remotes/origin/* # timeout=10
>C:\Program Files\Git\bin\git.exe rev-parse"refs/remotes/origin/master^{commit}" # timeout=10
Checking out Revision f167510d99abb5af2674db52227860cf423869fa(refs/remotes/origin/master)
>C:\Program Files\Git\bin\git.exe config core.sparsecheckout #timeout=10
>C:\Program Files\Git\bin\git.exe checkout -ff167510d99abb5af2674db52227860cf423869fa # timeout=10
Commit message: "Ajout de fichiers .copy manquants"
[…]
In addition, a new Git menu appears on the Jenkins page for the build (here #5).
Through this article and its pre-requisites, we have used Git to link the test automation engineer's workstations that use Agilitest and the Jenkins server. Our continuous integration chain is ready!
