When creating a test, it is often necessary to manage and organize your scripts efficiently to guarantee a smooth workflow and simplified maintenance.
Agilitest offers 4 different levels of scripting:
- Subscripts
- Scripts
- Suites
- Jobs (Jenkins)
Script levels provide an essential structure for programming and automation, allowing you to manage varied and complex tasks with organization and efficiency.
Scripts
How to create a script
There are two ways to create a script:
- In the project explorer click on the “Create an ATS script” button
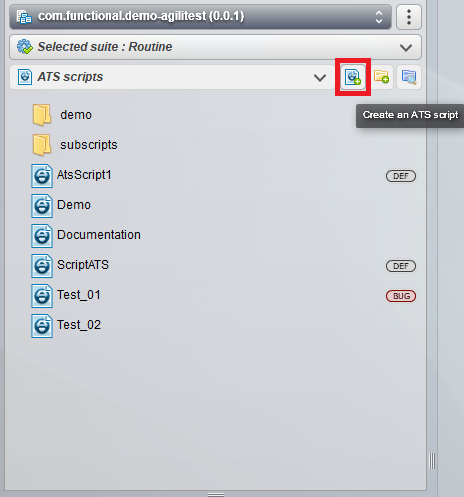
2. At the top left of the editor, by clicking on “New component”

Enter the name of your script. This will open an editing window with graphical interpretations of the actions to be performed on your script. The ATS format is a textual format that will describe all its actions.
.png)
Subscripts
Sub-scripts allow you to factorize common test functions, such as test data creation, logins, regularly used operations, etc...
You can also pass values as parameters to your sub-scripts, making them scalable and generic. It's also a good way of making your test scripts readable and easy to maintain.
How to create a sub-script
A sub-script and a script have the same configuration in Agilitest.
To create a sub-script, you need to create a sub-script call action in your script.
There are two ways to do this:
- Either by entering the name of the sub-script in the action
To do this, click on the call sub-script action in the actions menu.
.png)
Click on “Call the script [ ]” to enter information
.png)
Then, select the name of the script you want to call as a subscript
.png)
2. Either by drag and dropping a script in your test
From the Project Explorer, click on a script you wish to use as a sub-script and drag it into your script.
.png)
This will create a “Call the script” action
Agilitest also lets you pass values as parameters to your sub-scripts, making them evolutive and generic.
A sub-script created from a script will always perform the actions of which it is composed with the same parameters. It is also possible to modify the values of the sub-script to use it in several possible configurations.
For more information, you can consult the documentation on passing parameters to a sub-script.
Execution Suites
A suite is very useful for defining test selection criteria. These suites can be made up of tests that differ from one another, or they can be grouped by identical areas: functional, importance and priority when rereading, typing, execution environments, etc...
Executed suites can also be filtered by groups.
To find out more about how groups work, see the Group Management documentation.
How to create a Suite
Open your project menu, then click on "Execution management" to open the Project builder.
.png)
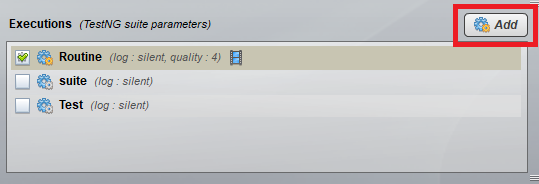
From this page, you can create “Executions”.

Click on the “Add” button to create a new execution Suite,
Then, click on “Import scripts” in the "Scripts" part to add scripts to your execution,
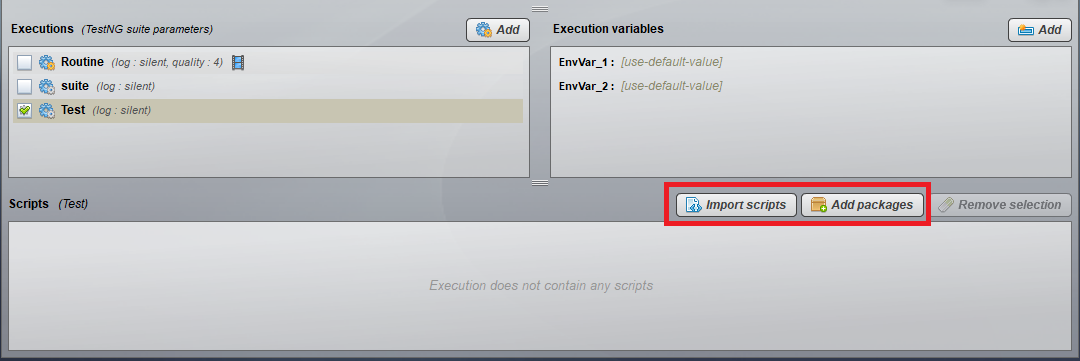
You can also directly drag and drop scripts from your project explorer to the "Script" part of your Suite.
💡 Tip
Even if your script is made up of sub-scripts, to create a suite simply add your script, no need to add the sub-scripts since they're used in your script.
Configure Suites
You can also add parameters to your script execution.
To do this, click on the button that appears on the suite line to open the parameters window.

You can choose your log level, activate your suite's reports and you can also add a description.
🔸 Warning
Make sure you're on the right Suite when you want to make changes to it. This is verified when the Suite line is highlighted.

The green tick means only that the Suite has been selected for execution. There may be several Suites selected, which will then be executed one after the other.
Once you've created your suites, you can select the ones you want and then click on "Generate" → "Compile" → "Execute" to execute them in Java mode.
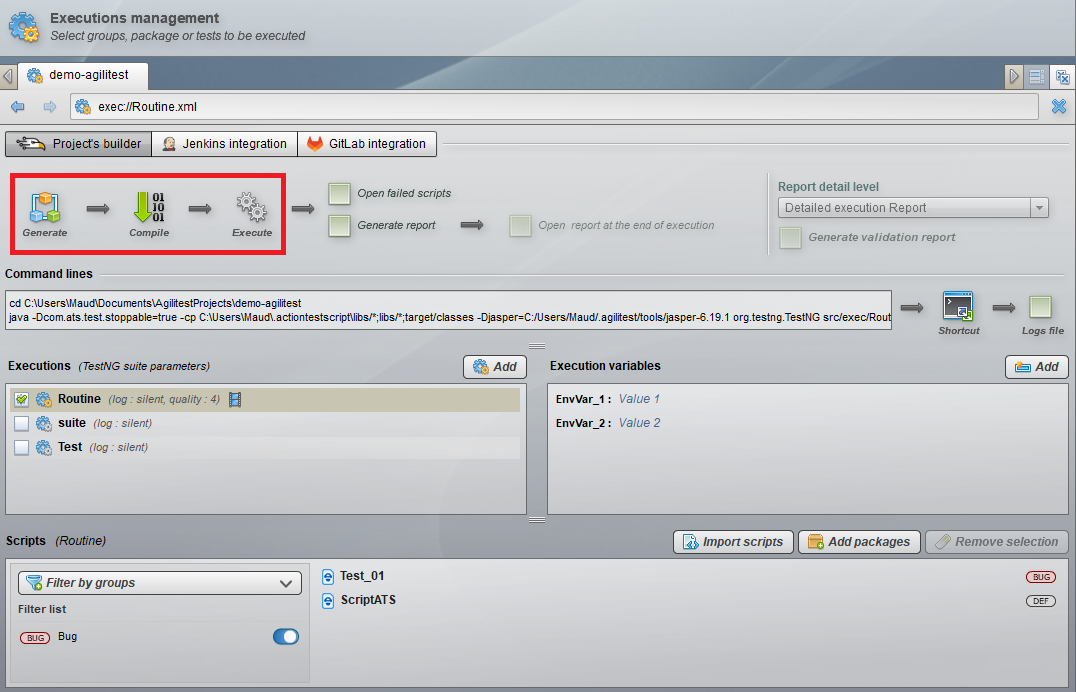
To know more, you can consult our TestNG executions documentation
Jenkins Jobs
A job corresponds to the execution of your Suites. It is used to schedule recurring executions to ensure that all your tested functions are OK or not.
These Jobs, which will automatically launch your tests on your Web, Desktop, API or Mobile solutions, will be displayed on a highly graphic monitor. This can help you ensure the quality of your solutions on a daily basis.
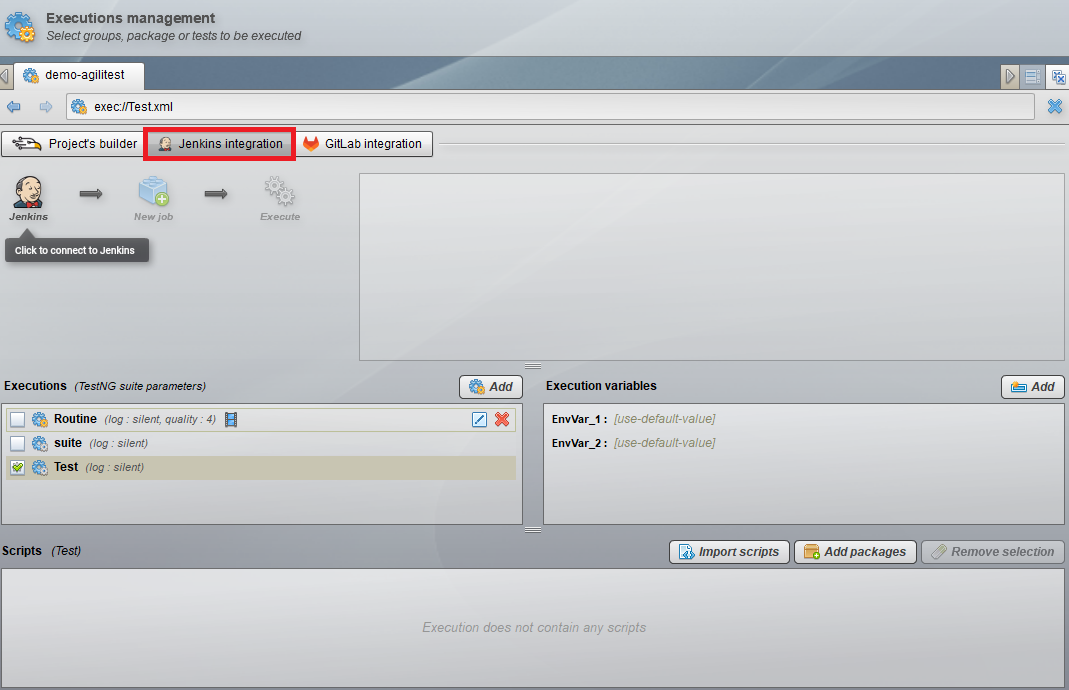
To create a job, click on the "Jenkins integration" button,
Click on the Jenkins icon to connect to Jenkins
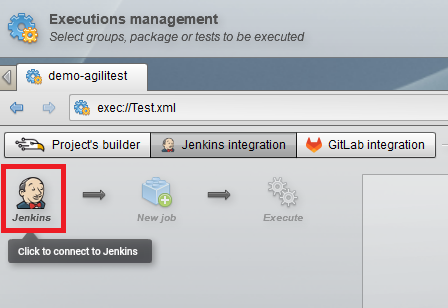
Then, click on "New Job",

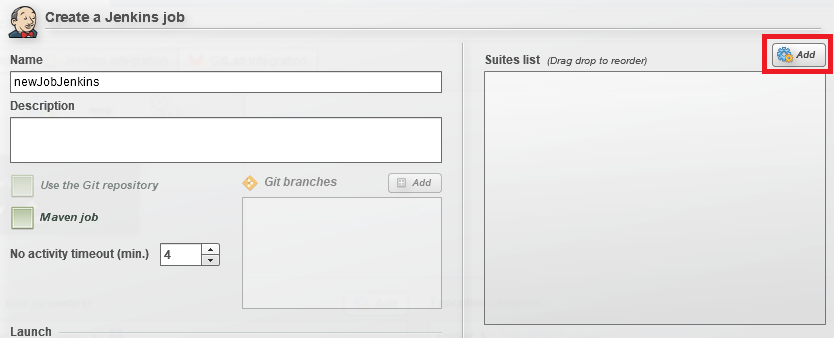
This will open the window to create a Job
.png)
You'll be able to enter your Job name, add any parameters you wish, and activate reports and notifications.
To add Suites to your Job, click on the "Add" button in the Suites list.
To execute your Job from Agilitest, tick the box on the Job line to select it, then click "Execute".

The status of your execution will be displayed in the Jenkins window.
If you'd like to run your suites without having to use Jenkins, this is also possible, as described above. Simply tick the suites you wish to run directly from the project builder.
To know more, you can consult our Jenkins integration documentation


