Editing actions
▶️ You can find a tutorial on how to edit actions on our Youtube channel.
During the creation of your tests you will interact with the Agilitest editor. The editor allows you to create actions and to manage their executions in order to improve the maintenance of your tests.
Script properties
To have global information about your scripts you can consult the script properties.
To do that, do a right click on your script and select “edit properties”.
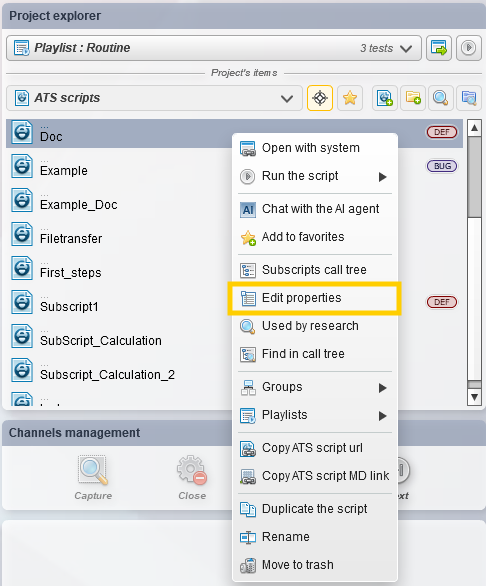
The script properties window will be displayed.
.png)
In this window you can find:
- The date of creation of your script
- The number of actions
- The number of subscripts
- The number of playlists it is featured in
- Diverse notes
- Links associated with the script
Create actions
Your created actions are going to be added one after the other in your script. It is possible to change their order manually directly in the editor.
There are three ways to create new actions:
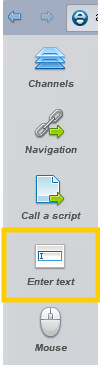
Actions menu
This menu appears when you have opened a script. It contains the actions used during a test.

To create a new action, simply click on one of the actions in the menu and it will be added to the editor.
Example :
If you want to create an “Enter text” action, click on the corresponding action in the menu,
Then, the newly created action appear, empty of any information, in your script

You will need to complete your action manually or by dropping an interface element.
Action created from a captured element
Once your element is captured with the capture tool, click on “Drag drop into editor”

While holding your element with your mouse, drag it into your editor and place it under an action to make the “Create action” input appear.

The generated action is linked to a graphical element in your application.
Select the action you want to do on your element.

All actions are not available from this contextual menu. To have access to all the actions you can check the actions menu.
Copy and paste an action
By doing a right click on on an action in your script, or a group of action, a contextual menu with different options appears.
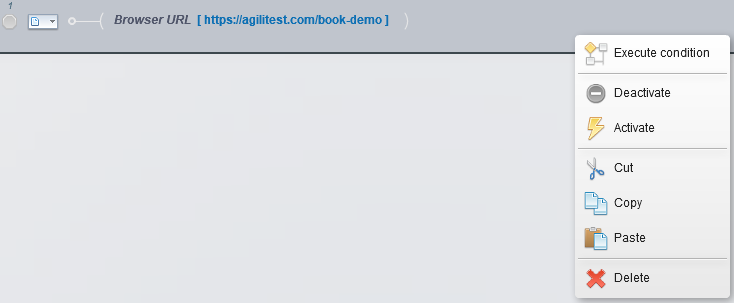
This menu allows you to:
- Copy/cut and paste
- Delete permanently an action
- Deactivate/activate an action or a group action
A deactivated action will be grayed out in your script and they won't be played during the execution of the script.

Active actions
You know that an action is selected when its colour is dark grey. This is what is called an active action.
.png)
You can select multiple active actions.
To do that, select the first action, then press the SHIFT key on your keyboard and select the last one
.png)
All the actions in between those two actions will be selected (cf. from action 1 to action 3).
You can also use the CTRL key on your keyboard to select separately one or multiple action to add in a group of active actions.
Actions linked to the application’s elements
What is an action composed of?
Agilitest editor gives graphical interpretations of the actions that will compose your scripts. The ATS format, which is a test language, is a text format that describe the whole of the actions.

- Each action has an index that add up automatically and is numbered depending on its position in the script (cf. index 2).
- Next to the index is the nature of the action, which can be parametered
3. Under the nature of your action, you have the interface element and its options. In the options you can modify, specify or enter manually the Locator, which is the targeted element.
Actions on the interface element
Click on the lego icon to the right of your element to add attributes to your element.
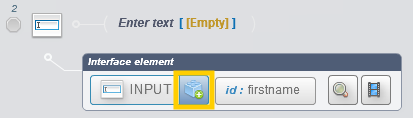
Enter or modify attributes

You can also click on the element to add parents or children and specify their type.
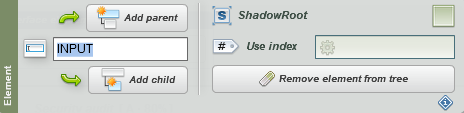
If your locator, i.e your targeted element, can retrieve multiple elements on a page, click on the “#” to specifiy which element to select by its apparition order.

💡 Tip
This functionnality can be useful to select a specific row or column in a table.
Empty element
An action may not have an element.
You can create an action by drag and dropping a captured element into your empty action.
Click on the root application to show different options

- Addition of an interface element: With this you can create an element with search criterias (type of element, parents, etc…)
.png)
It is also possible de variabilize the element index.
- Dialog box: This is allows you to manage and execute actions on a dialog box
.png)
For further information you can consult the documentation on how to automate a dialog box.
- Screen record: With this feature you can count shapes in a video.
.png)
Self-Healing with AI
Usually, if a button's identifier (ID) or CSS class changes, the ATS script fails because it can no longer find the element. With the healing option, instead of stopping, the execution engine (ats-core) pauses and requests assistance from an AI.
Self-healing aims to solve one of the most costly problems in test automation: the maintenance of selectors (locators) that "break" following a user interface update.
The AI analyzes the current DOM of the page and the original intent of the action to propose a new selector or an alternative strategy (e.g., clicking on a neighboring element or using text instead of the ID).
The action is then immediately replayed using the new solution, without any human intervention.

Why is it important?
- Reduction of “flaky tests”: Tests become much more robust in the face of minor design changes.
- Time savings: Your test campaigns (especially in CI/CD) no longer fail due to minor technical issues, allowing you to focus on actual functional regressions.
- AI transition: This is a practical application of generative AI in the test lifecycle (QA), moving from writing assistance to execution assistance.
Configuration and activation
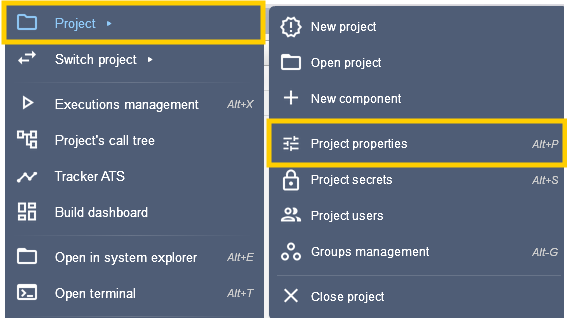
To use this feature, you must have an AI provider (OpenAI, Anthropic/Claude, or a local model via Ollama) configured in your project properties.
Open the project properties in Agilitest
Then, activate the AI healing button.

- The activation tag: You must add the @healing attribute to the ats.aiproviders property..
If you delete your AI providers, healing mode is automatically disabled to prevent cascading errors.
Example:
If you have a script that search BUTTON [id=login_01], but the developer of the app rename it BUTTON [id=submit_login]:
- ATS fails to find
login_01. - It sends the surrounding HTML context to the configured AI.
- AI answers: “The element seems to have become
BUTTON [id=submit_login]". - ATS tries to click on this new selector.
Visibility and Reporting
“Healing” is not invisible; it is crucial to know that a test has been “repaired” in order to update the original script later.
A specific note appears in the execution report (ats-report.html file or ats-overview.html). It indicates which selector failed and what correction the AI applied.
This allows you to distinguish a “true application bug” from a simple “script maintenance issue.”
Example :
The test continues, and you can see in your report: Action healed by AI: [id=login_01] -> [id=submit_login].
