▶️ You can also watch our tutorial on Mouse actions on our Youtube channel.
During your tests, the mouse actions proposed by the Agilitest editor are used to simulate the mouse actions made when using the application under test.
Mouse actions can be used for all applications, including mobile applications (the click corresponds to a tap on the screen).
Create a mouse action
There are two ways to create a mouse action:
- From the actions menu
In the Agilitest editor, click on the mouse action
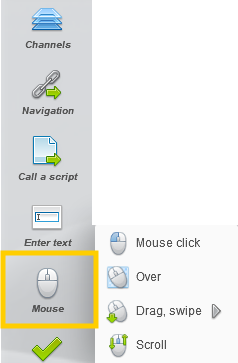
Then, you can select the mouse action type you want to execute precisely.
2. By creating an action with a locator
Once you have captured an element with the capture tool, drop it into the editor to create an action.
.png)
Hover over the mouse action to open a sub-menu and click on the type of mouse action you want to execute.
.png)
🔸 Warning
When you drag and drop an element to create an action, do not click on “Mouse” action. You only need to hover to open the sub menu (cf. image above)
Types of mouse actions
Mouse click
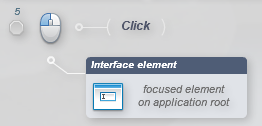
The mouse click action is used to do a click on the tested application or to simulate finger pressure on a mobile test.
You can edit and specify the type of mouse click you want to do by clicking on the Mouse action in the editor.

You will have access to a sub-menu that allows you to select the type of click you want to generate: left click, wheel click, right click or double click.
By default, the click is at the center of the element. However, you may want to click on an offset zone or on another element whose Cartesian coordinates you know based from the captured element.
To do that, you can select a corner or side of the element from which you are going to specify a Cartesian offset.

Positives coordinates will always define a point inside the element.
Example :
If you select the top right corner with a 10x and 10y offest, then click will be pointed 10 pixels at the top right inside your element’s box
You can also add the press of the “CTRL” or “Shift” key to your click action.

Over
The hover action lets you indicate that you want to hover over a specific area of the screen. This is particularly useful for unfolding the drop-down menus in your applications.
.png)
As with other mouse actions, you can also redefine the mouse position using Cartesian coordinates.
.png)
Drag, drop, swipe
Drag and drop actions simulate a mouse movement during which the left mouse button is held down.
This action is very often used to perform drag-and-drop operations between several windows in one or more applications.
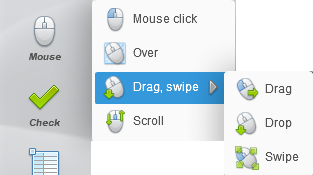
The actions must be carried out in this order:
- Start with a drag action by defining the element from which you want the left click to start and then hold.
- (Optional) Insert zero or more swipe actions: these correspond to swipe zones that are visited by the mouse with the mouse button held down.
- Then add a drop action by defining the element on which the mouse button is released.
The swipe action can also be carried out independently from the drag and drop.
Once you have entered the element on which your swipe action will be performed, you can specify the action.
To do that, click on the swipe action
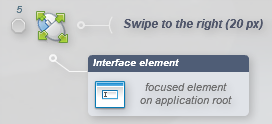
A swipe 20 pixel to the right is set by default.
This will open the actions parameters menu
.png)
You can change the orientation of the swipe by clicking on the directional arrows as well as define the number of pixels vertically or horizontally.
As with other mouse actions, you can also redefine the mouse position using Cartesian coordinates.
Scroll
The scroll action simulates a rotation of the mouse wheel, causing the displayed page to scroll. In the case of a mobile application, scrolling means swiping the screen.
In both cases, Agilitest is used to indicate the number of pixels for scrolling up or down. This number is positive if you want to scroll down.
To be effective, the selected interface element must respond to a scrolling action. You can perform this action on the main application window by not selecting an interface element.
The action can be used on sub-windows (DIV) which have scrolling options, by selecting the element including the desired window.
When the scrolling action is created, it will be performed as automatic scrolling by default.
However, it is possible to set the scrolling you wish to execute.
To do that, click on the scroll action
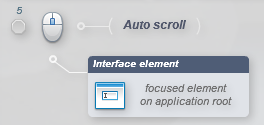
In the action parameters, you can define the pixel value to be scrolled.
.png)
This can be done by manually entering the value, or by placing your mouse over the square provided and scrolling your mouse wheel up or down.


