One of the features of Agilitest is the ability to use subscripts. This will allow you to factorize the common functions of your tests. Agilitest also allows you to pass values as parameters to your subscripts and thus make your subscripts scalable and generic.
A subscript created from a script will always perform the actions it is composed of with the same parameters.
It is also possible to modify the values of the subscript to use it in several possible configurations.
There are different ways to pass parameters to a subscript:
- Manually, by entering the parameters in the script
- or with a dataset, using a CSV/JSON file
▶️ You can find a 3 part tutorial about passing parameters to a subscript on our Youtube channel : Part 1, Part 2, Part 3
Add parameters to a susbcript
If you don't have a sub-script call action in your script, you can create one in two ways:
- Enter the name of the subscript in the action
To do that, click on the action Call a script > Sub-script
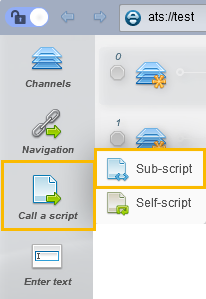
Click on the action “Call the subscript [ ]” to enter information

Then, enter the name of the script you want to call as a subscript.

2. Drag a script into your test
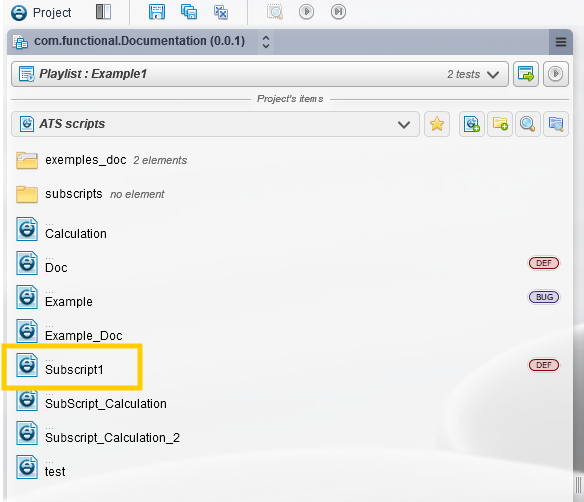
From the project explorer, click on a script you want to use as a subscript and drag it into your script.

This will create a “Call the script” action with the dragged script.

1. Parameters entered manually
It is possible to pass parameters manually.
Once you have created the sub-script call action in your script, you can pass parameters manually to your sub-script, directly from your script.
To do this, click on the call sub-script action, "Call the script [scirpt_name]”
.png)
Then click on “Parameters list”

For information, the first parameter will always be named "Parameter 0", then the second parameter will correspond to "Parameter 1", the third parameter to "Parameter 2", etc…
.png)
Once you have entered the parameters in the script, you need to add them in the subscript.
To do this, open your subscript from the project explorer.
From your subscript, click on the action that will execute the parameters and then open the special values view.

Select "Script parameter" from the special values and choose the parameter you are interested in.
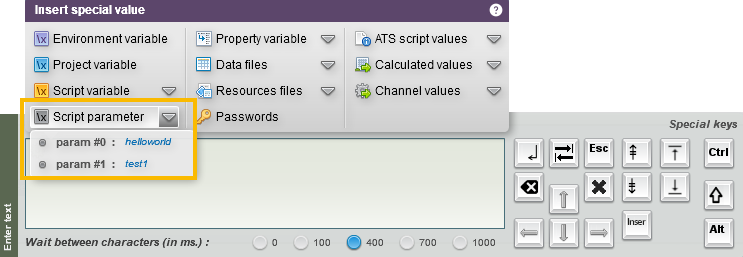
When the action of calling a subscript is executed, it will execute the specified parameters.
📙 To know more

With the call script action, a script will call a subscript. When the script has parameters defined, the subscript will retrieve them and pass them to $param(x) (see the scheme above "Passing parameters to a subscript from a script”)
During the execution, the parameters will be shown in a pop-up at the bottom to the right on the editor.
.png)
For your information, to make the pop-up indicating the settings reappear, you can click on the "\x" button.
.png)
When the parameters are entered manually, the execution of your parameters will be done only once. To multiply the iterations, you will have to create as many subscript call actions as the number of iterations you want. In other words, you will have to repeat the previous steps for each new iteration.
💡 Tip
Add comments to your parameters to track data and to tag the parameters. Those comments will be visible in the execution report.
2. Parameters entered with a data file (JSON/CSV/Properties)
Create a Data file
It is also possible to pass parameters from a JSON, CSV or Properties file. Those data files can create iterations so the behavior of the subscript on a data file will be to loop the number of iterations contained in the dataset.
Unlike a manual input, where you would have had to create the subscript call action several times and enter parameters each time, for a data file, the parameters will be organized in a table that will be used by a single subscript call action.
There are two ways to create a data file:
- Click on “New component” situated at the top left of the Agilitest editor

You can either select “CSV file”, “JSON file” or “Properties file”
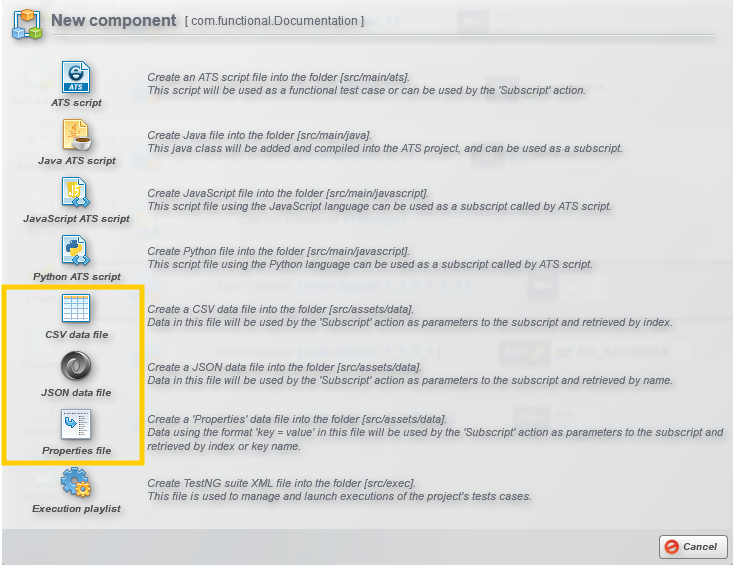
2. In the project explorer, open the “data files” view
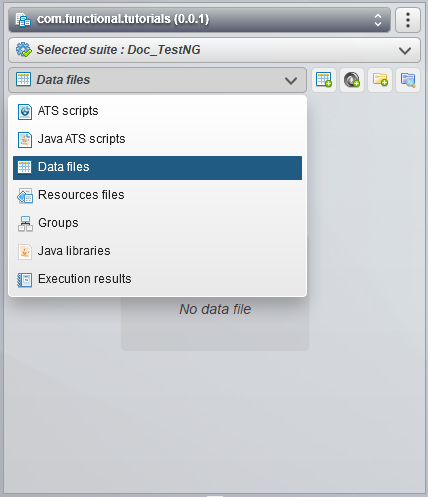
Finally, click on a button to create a JSON, CSV or Properties file
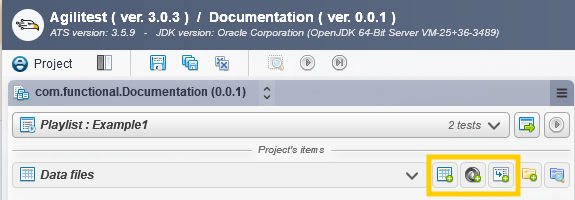
Once your data file is created, it can be used from a call script action.
To associate your data file to your script, click on the call script action “Call the script [name_of_script]”

Select “Data” file

There are two ways to add your data file in the action:
- Directly from the project explorer
Drag your data file from the project explorer to the call the script action.
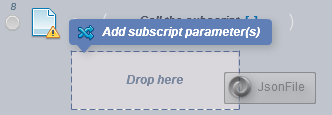
2. By selecting the file from Windows explorer
Click on the file icon to search your file from Windows explorer

Once your file is added to the subscript call action, it will automatically open during the execution of your test.
CSV, JSON and Properties files are in the form of a table.
.png)
They are both used in the same way with the only difference that it is possible to rename the column hearders in a JSON file.
.png)
In the table, you can add columns that correspond to the parameters, as well as rows that correspond to the iterations by clicking on the assigned buttons.
.png)
With a CSV/JSON file, the subscript is executed as many times as there are iterations.
Once your file is completed, you can recover the variable of your subscript by using the $param(…) function and by passing the value of the parameter column you are interested in.
Example :
Enter $param(0) in the action to return the value of the first column in your CSV/JSON file.
.png)
📙 To know more
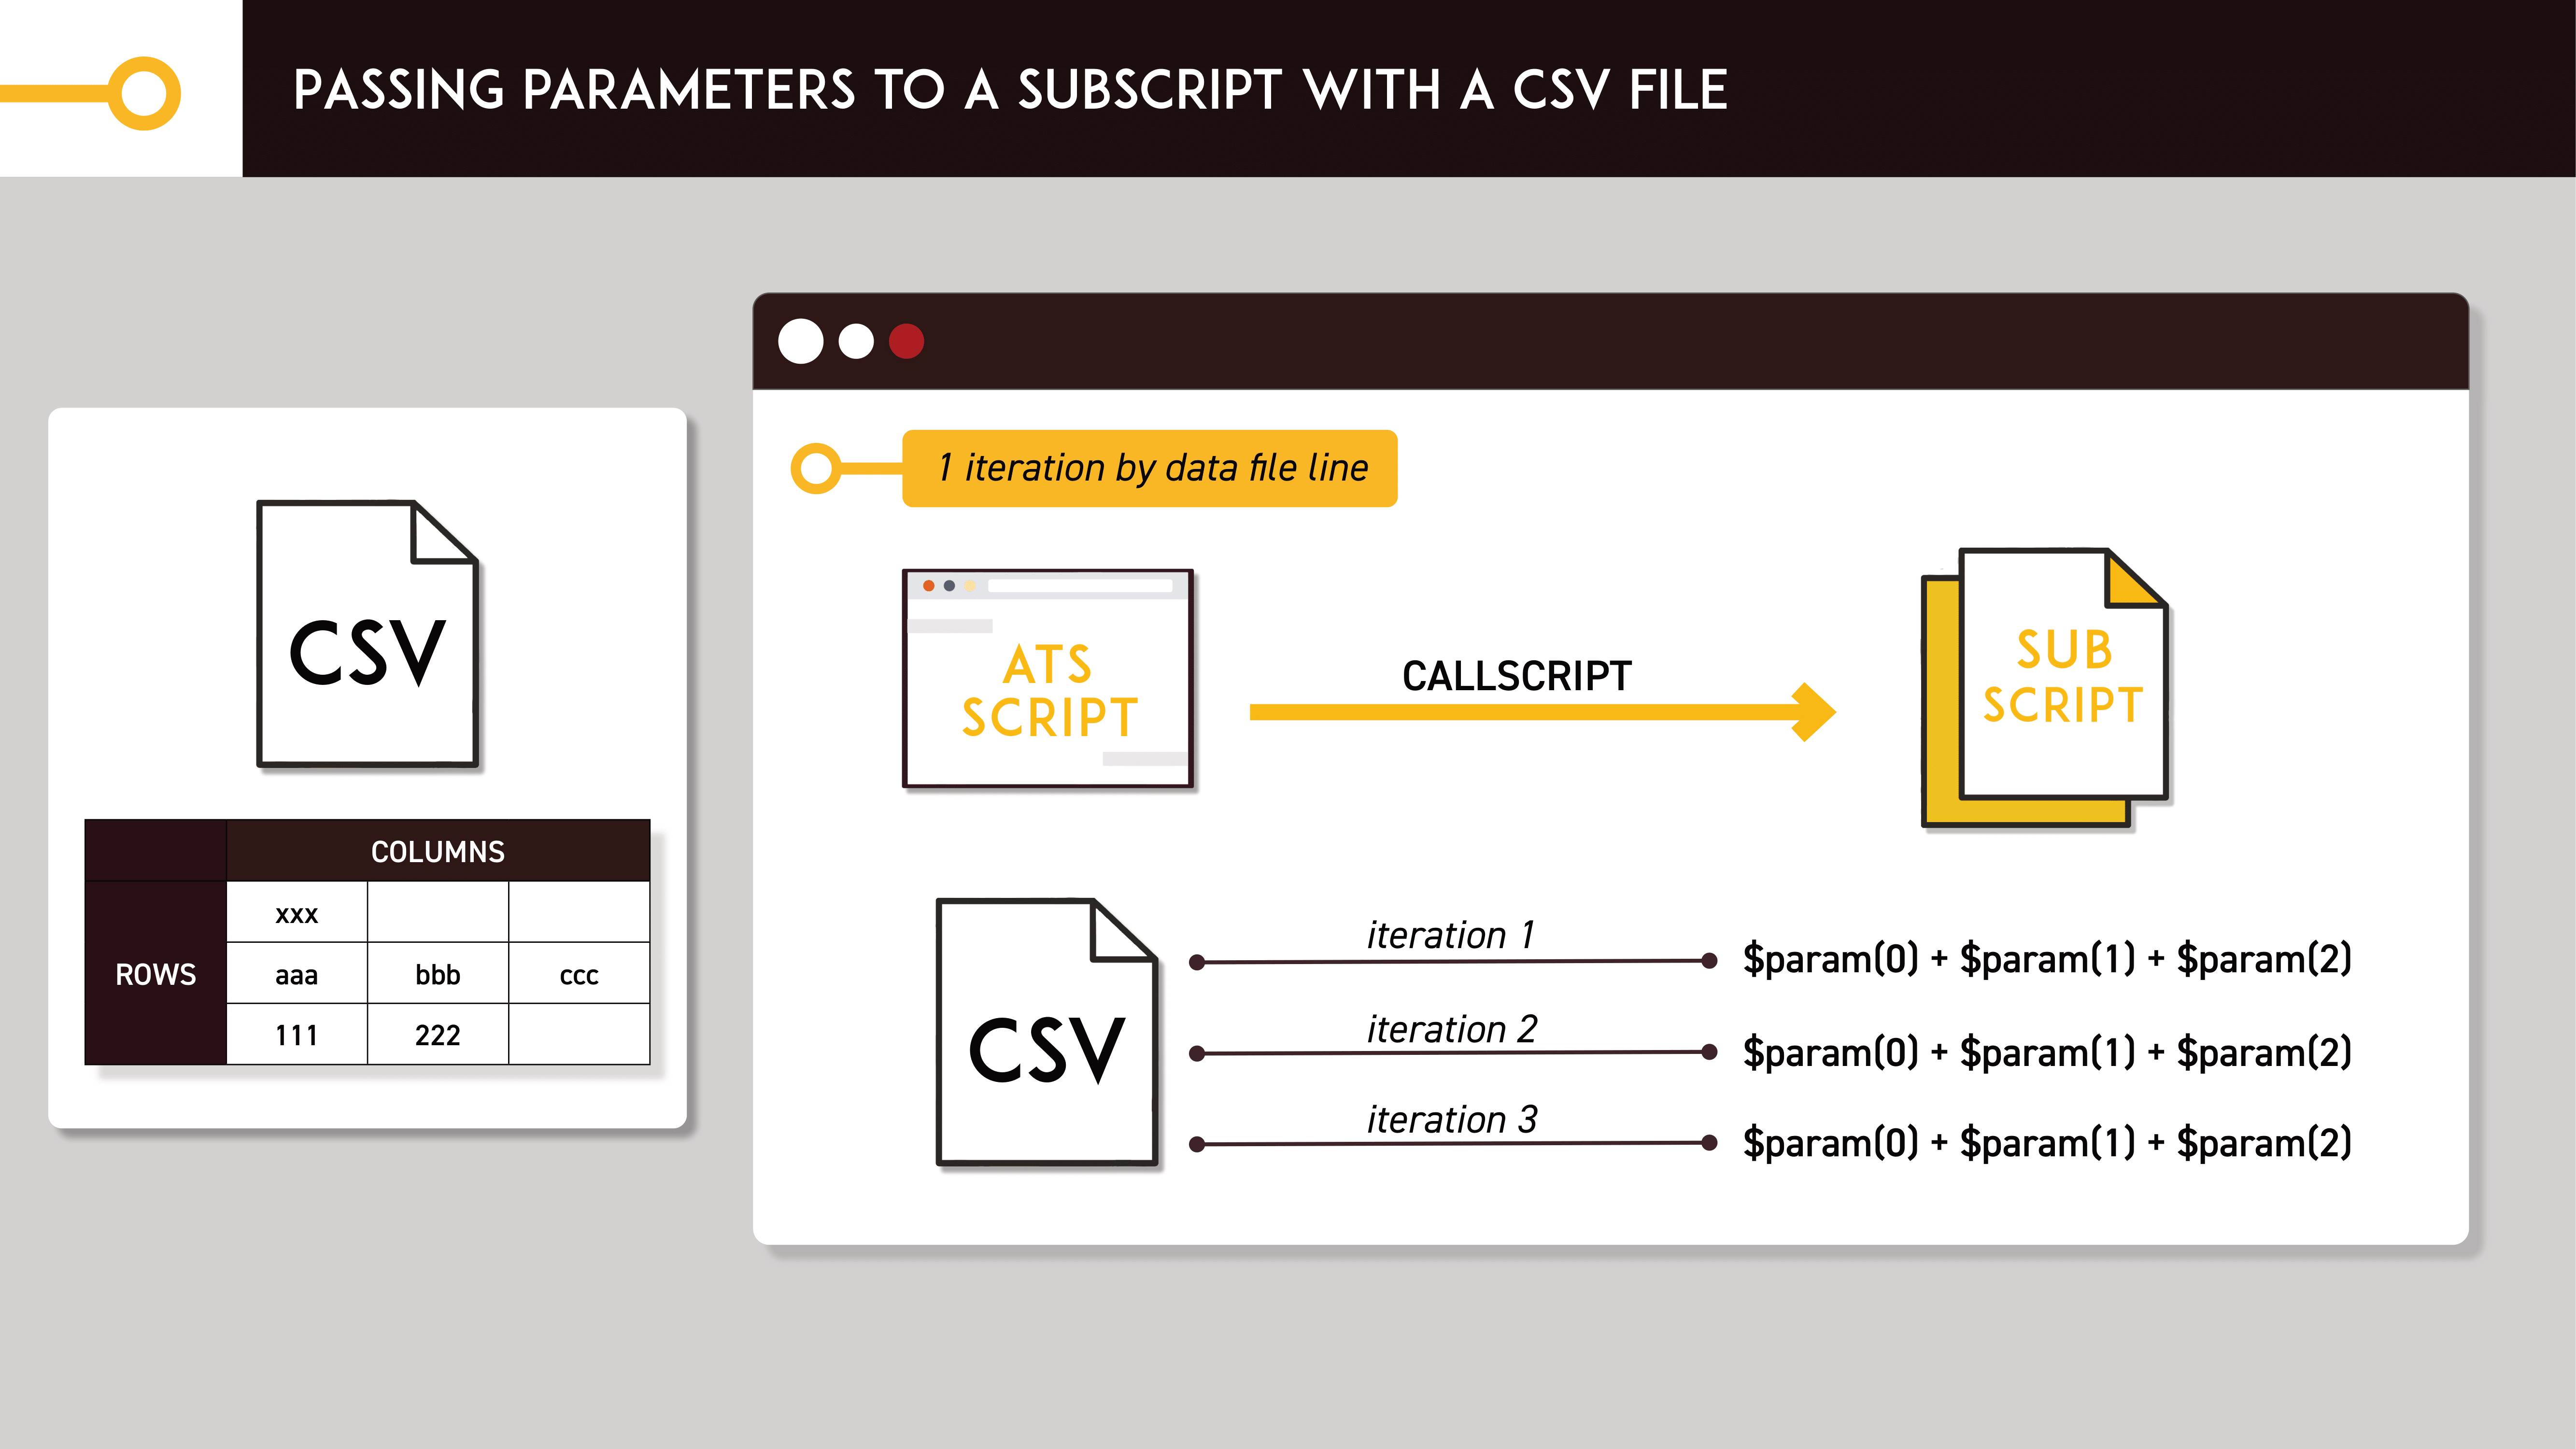
The parameters of the subscript are defined from a CSV (comma-separated values) file consisting of an array with rows and columns. Depending on the number of rows, this determines the number of times the file will be called, this is called iterations. (See the scheme above "Passing parameters to a subscript with a csv file")

The same goes for the parameters of the subscript defined from a JSON (JavaScript Object Notation) file composed of an array with rows and columns. Depending on the number of rows, this determines the number of times the file will be called, this is called iterations. (see the scheme above "Passing parameters to a subscript with a json file")
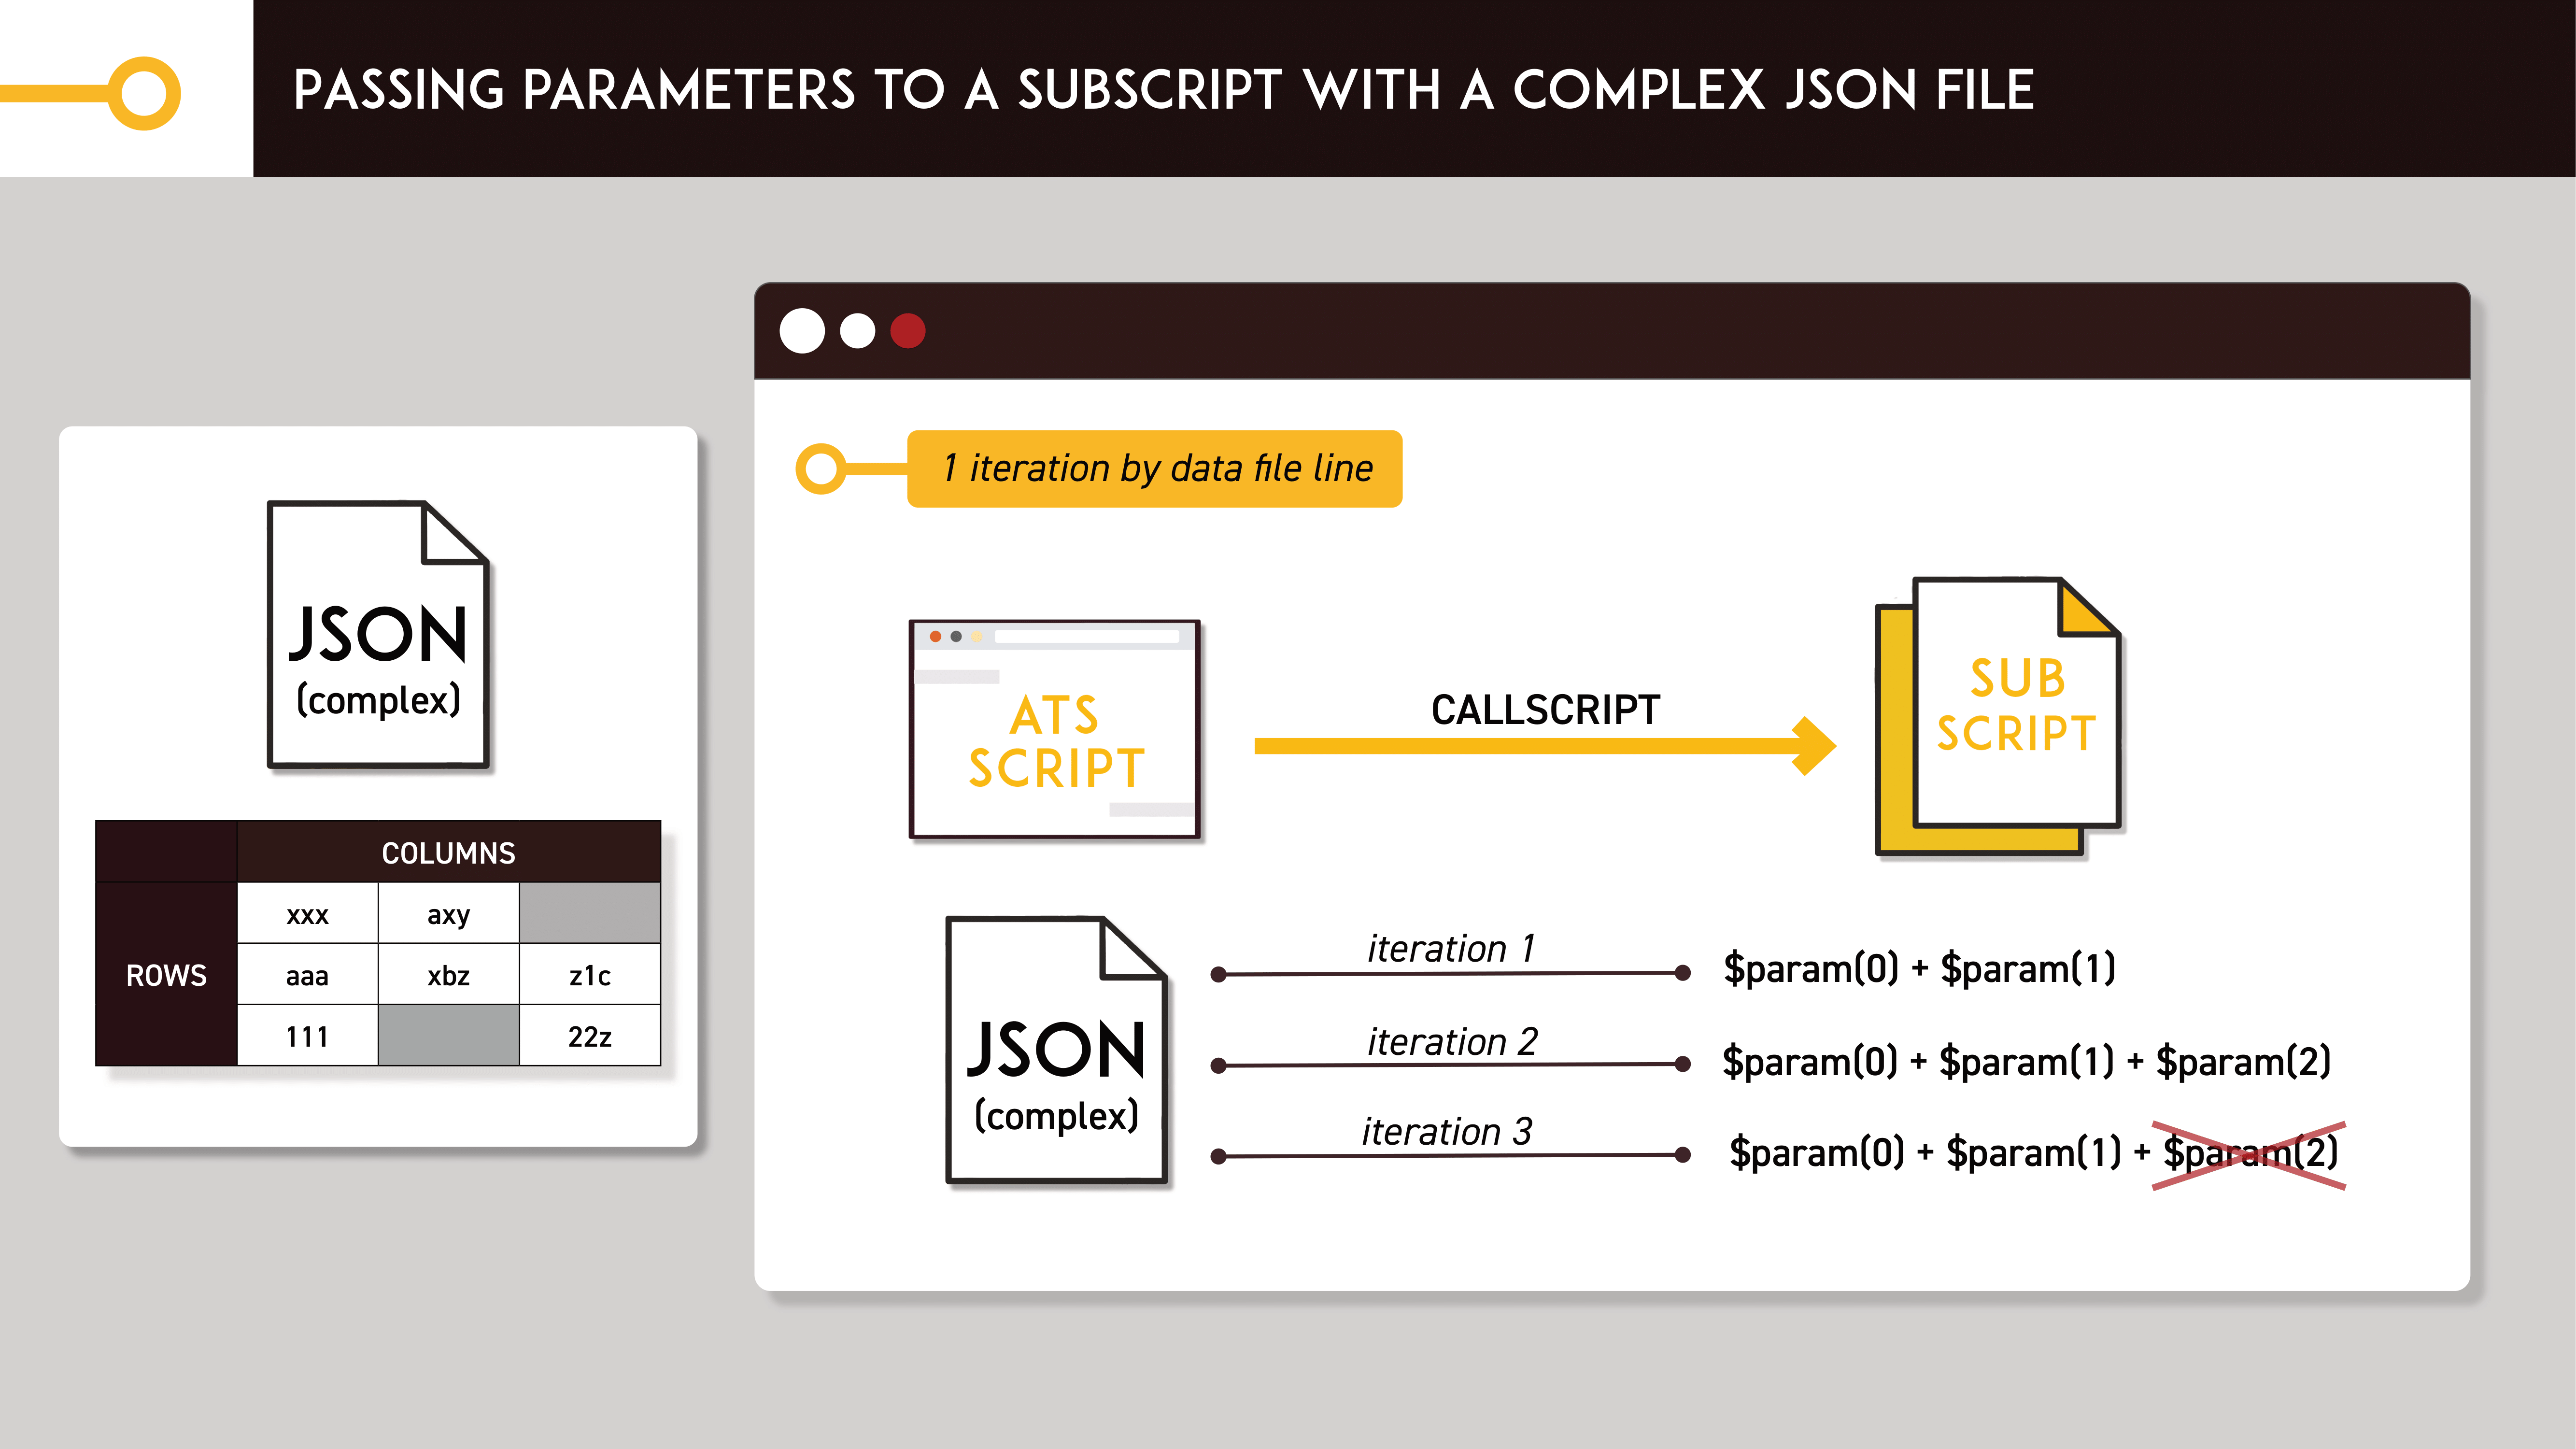
For a complex JSON file, it is composed of an array with rows and columns like a classical JSON file. Only, the iterations are done according to the number of values in a line. The number of values in a line corresponds to the number of parameters (See the scheme above "Passing parameters to a subscript with a complex json file").

Parameters can be created from an http file or a database from a web page. The principle is the same as for a JSON/CSV file, the iterations correspond to the number of lines and the parameters to the number of columns (see the scheme above "Passing parameters to a subscript with a http file").
Data file execution options
You can add options on the execution of your data files. By default, the iterations are done according to the order presented in the table, but it is possible to ask Agilitest to make the execution of your iterations random.
To do that, click on your element and check the box “Use random row”

You can also give a "Range of indexes", which allows you to limit the number of iterations among the total iterations that make up the JSON or CSV file.

If you want, with this option you can also execute only one precise row by indicating its number.
Example: If your JSON file consists of 150 iterations, you can specify 0-50 in the index range to limit the execution to the first 50 iterations.
Finally you have the option "Execute as suite" so that the execution continues until the end even if an iteration is in error.

When you encounter an error in one of the iterations, this will cause your test to be in error, and thus stop the test considering it as KO. This option allows you to consider each iteration as an independent test.
Example: On an execution of 50 iterations, if the 48th iteration encounters an error, it will be indicated as being in error but will not prevent going to the 49th and so on.
🔸 Warning
Actions created after the call script action is executed as a suite are not saved and will not appear in reports.
3. Parameters from an interface element
It is possible to make only one element of your parameters appear. In a complete subscript, if one of the actions does not have an element then the param(0) will be used by default. To fill in the param(0) that will be used, you can add a "Parameter element" to the action that calls the subscript.
From the call script action, click on "Parameter Element’".

Then add an element selected with the capture tool.
.png)
When you execute your subscript, it will display the element you have captured.
This is especially useful when you are looking for data in your table among a set of rows. Agilitest will allow you to iterate until you arrive at the line you were looking for and allows you to take a specific action on this line.
Example: You have a table that contains 5 different rows. By giving the component "table" as input to the subscript, Agilitest will loop through the rows of the table in the subscript.
📙 To know more
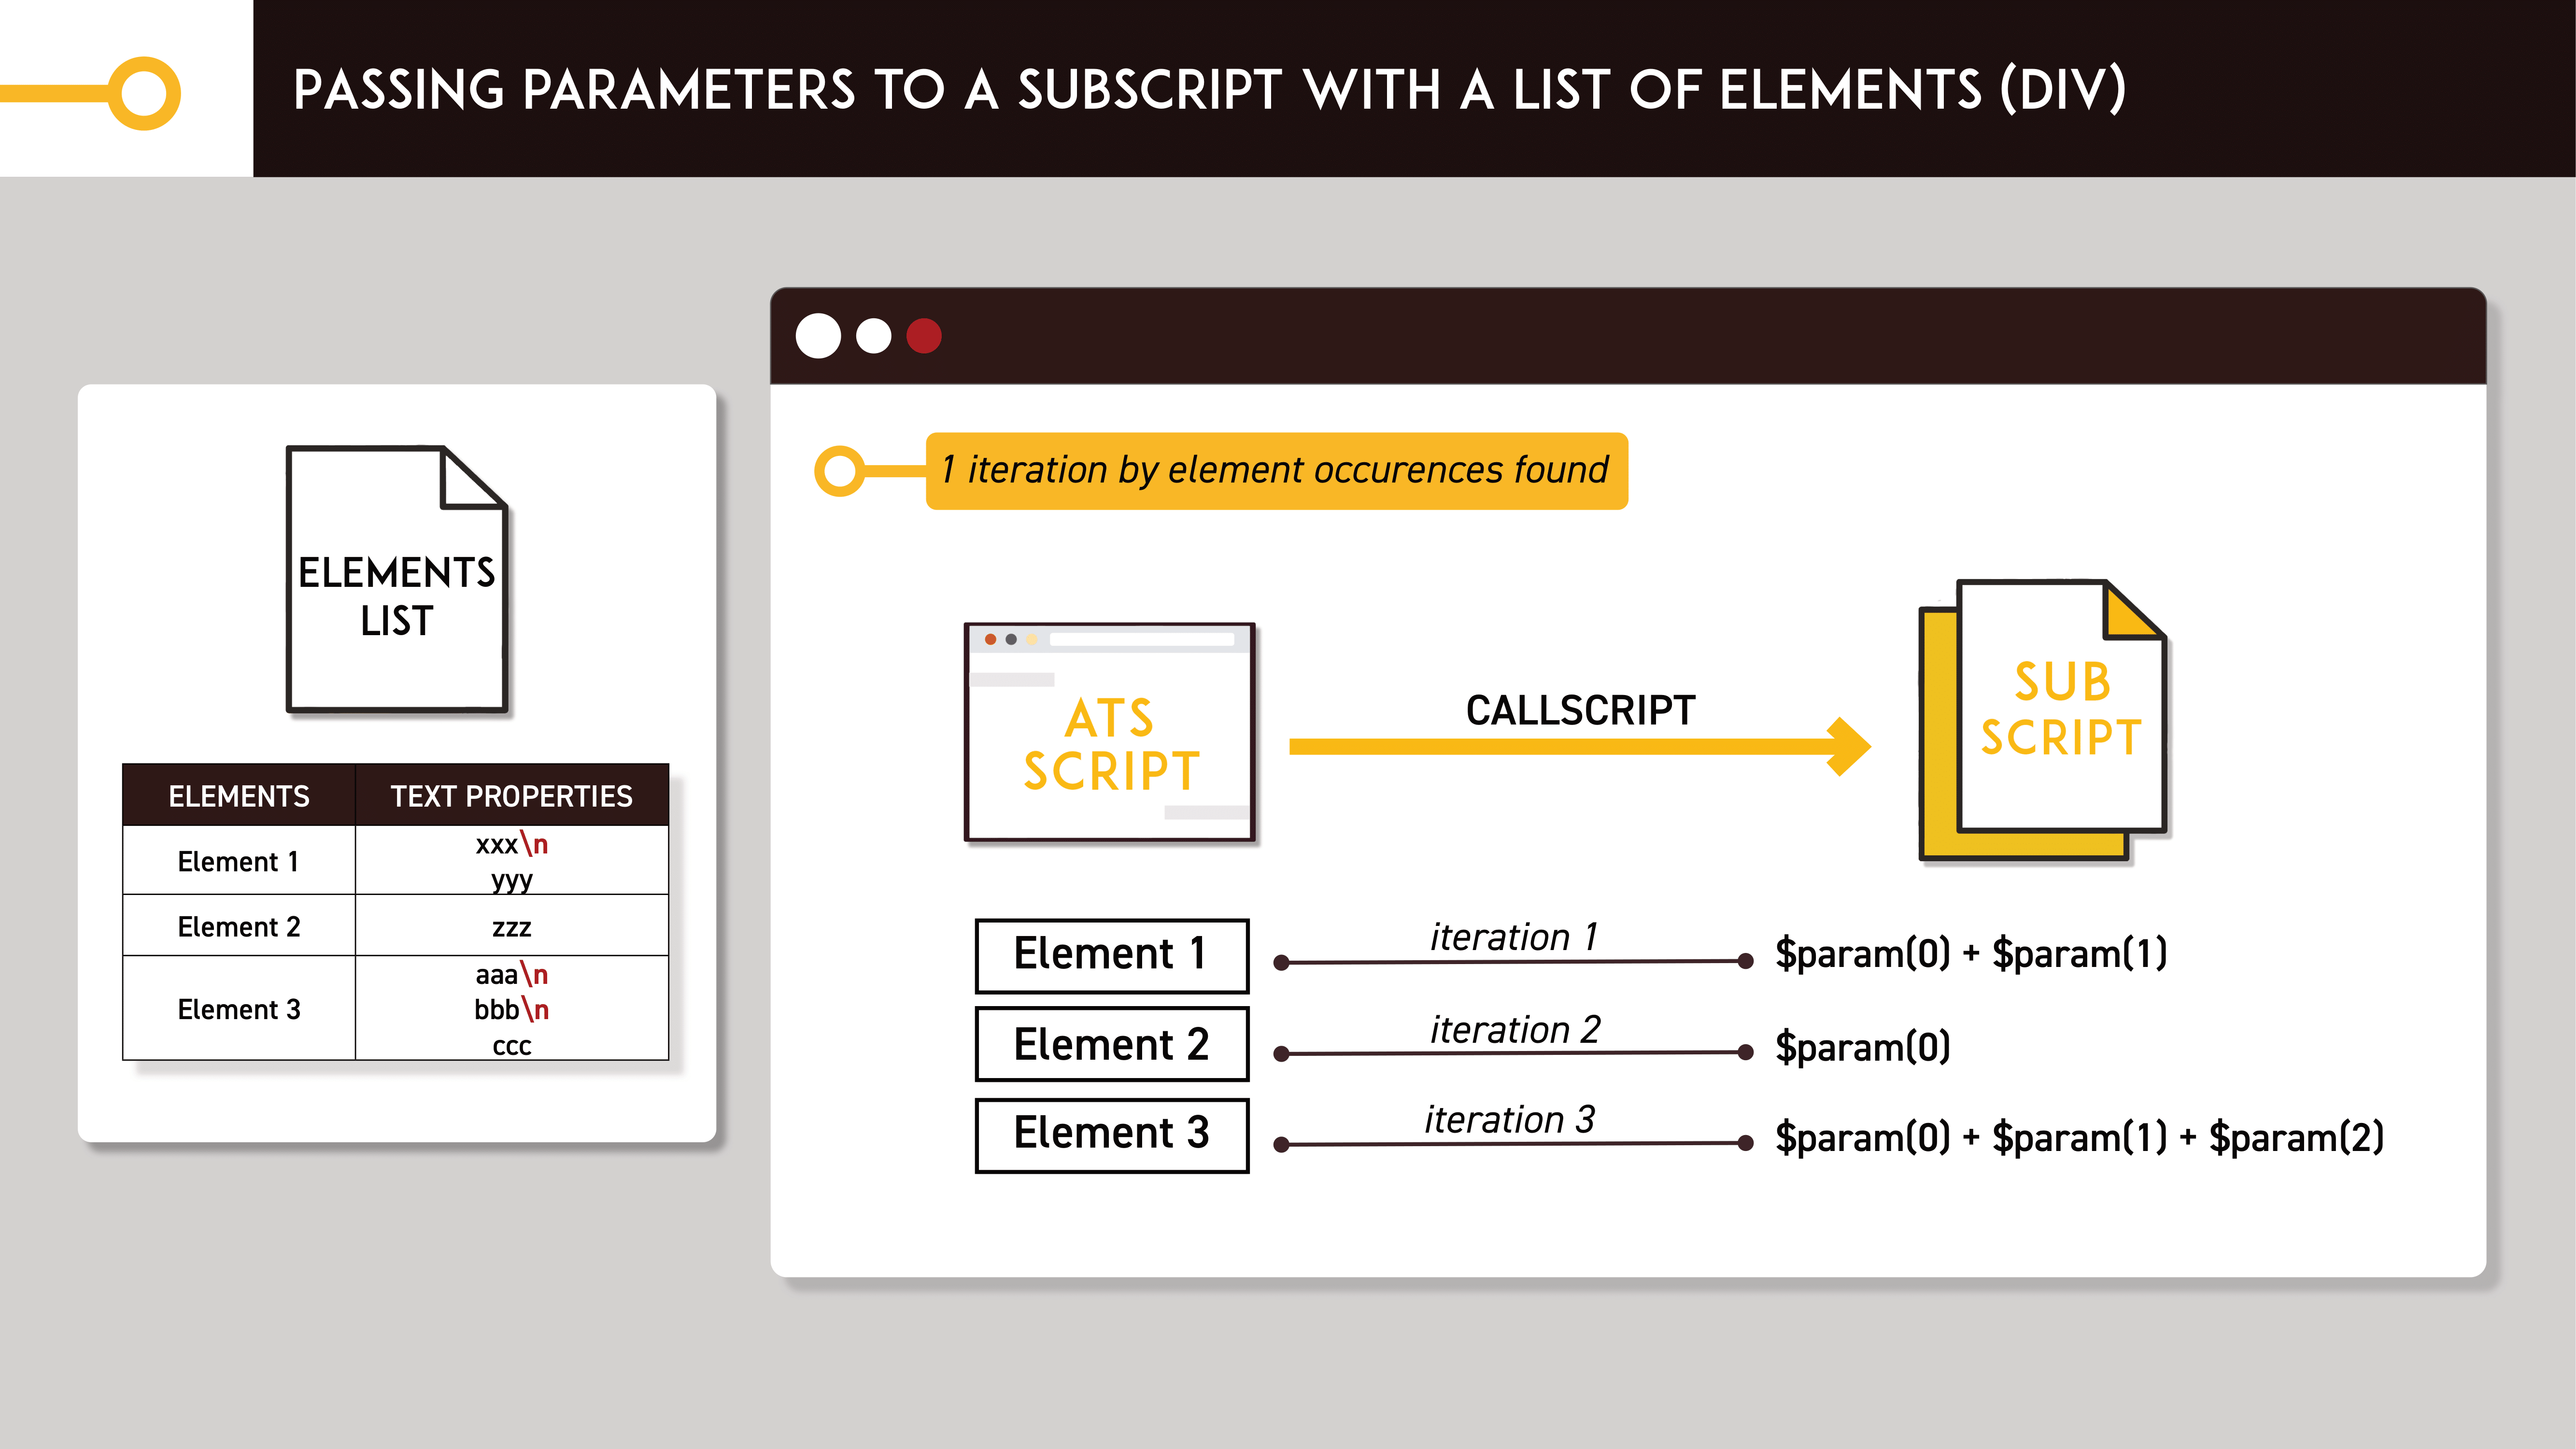
Parameters can also be taken from elements. For a list of elements (DIV), each element corresponds to an iteration and each separate value of a text property "\n" corresponds to a parameter. (See the scheme above "Passing parameters to a subscript with a list of elements (div)”)
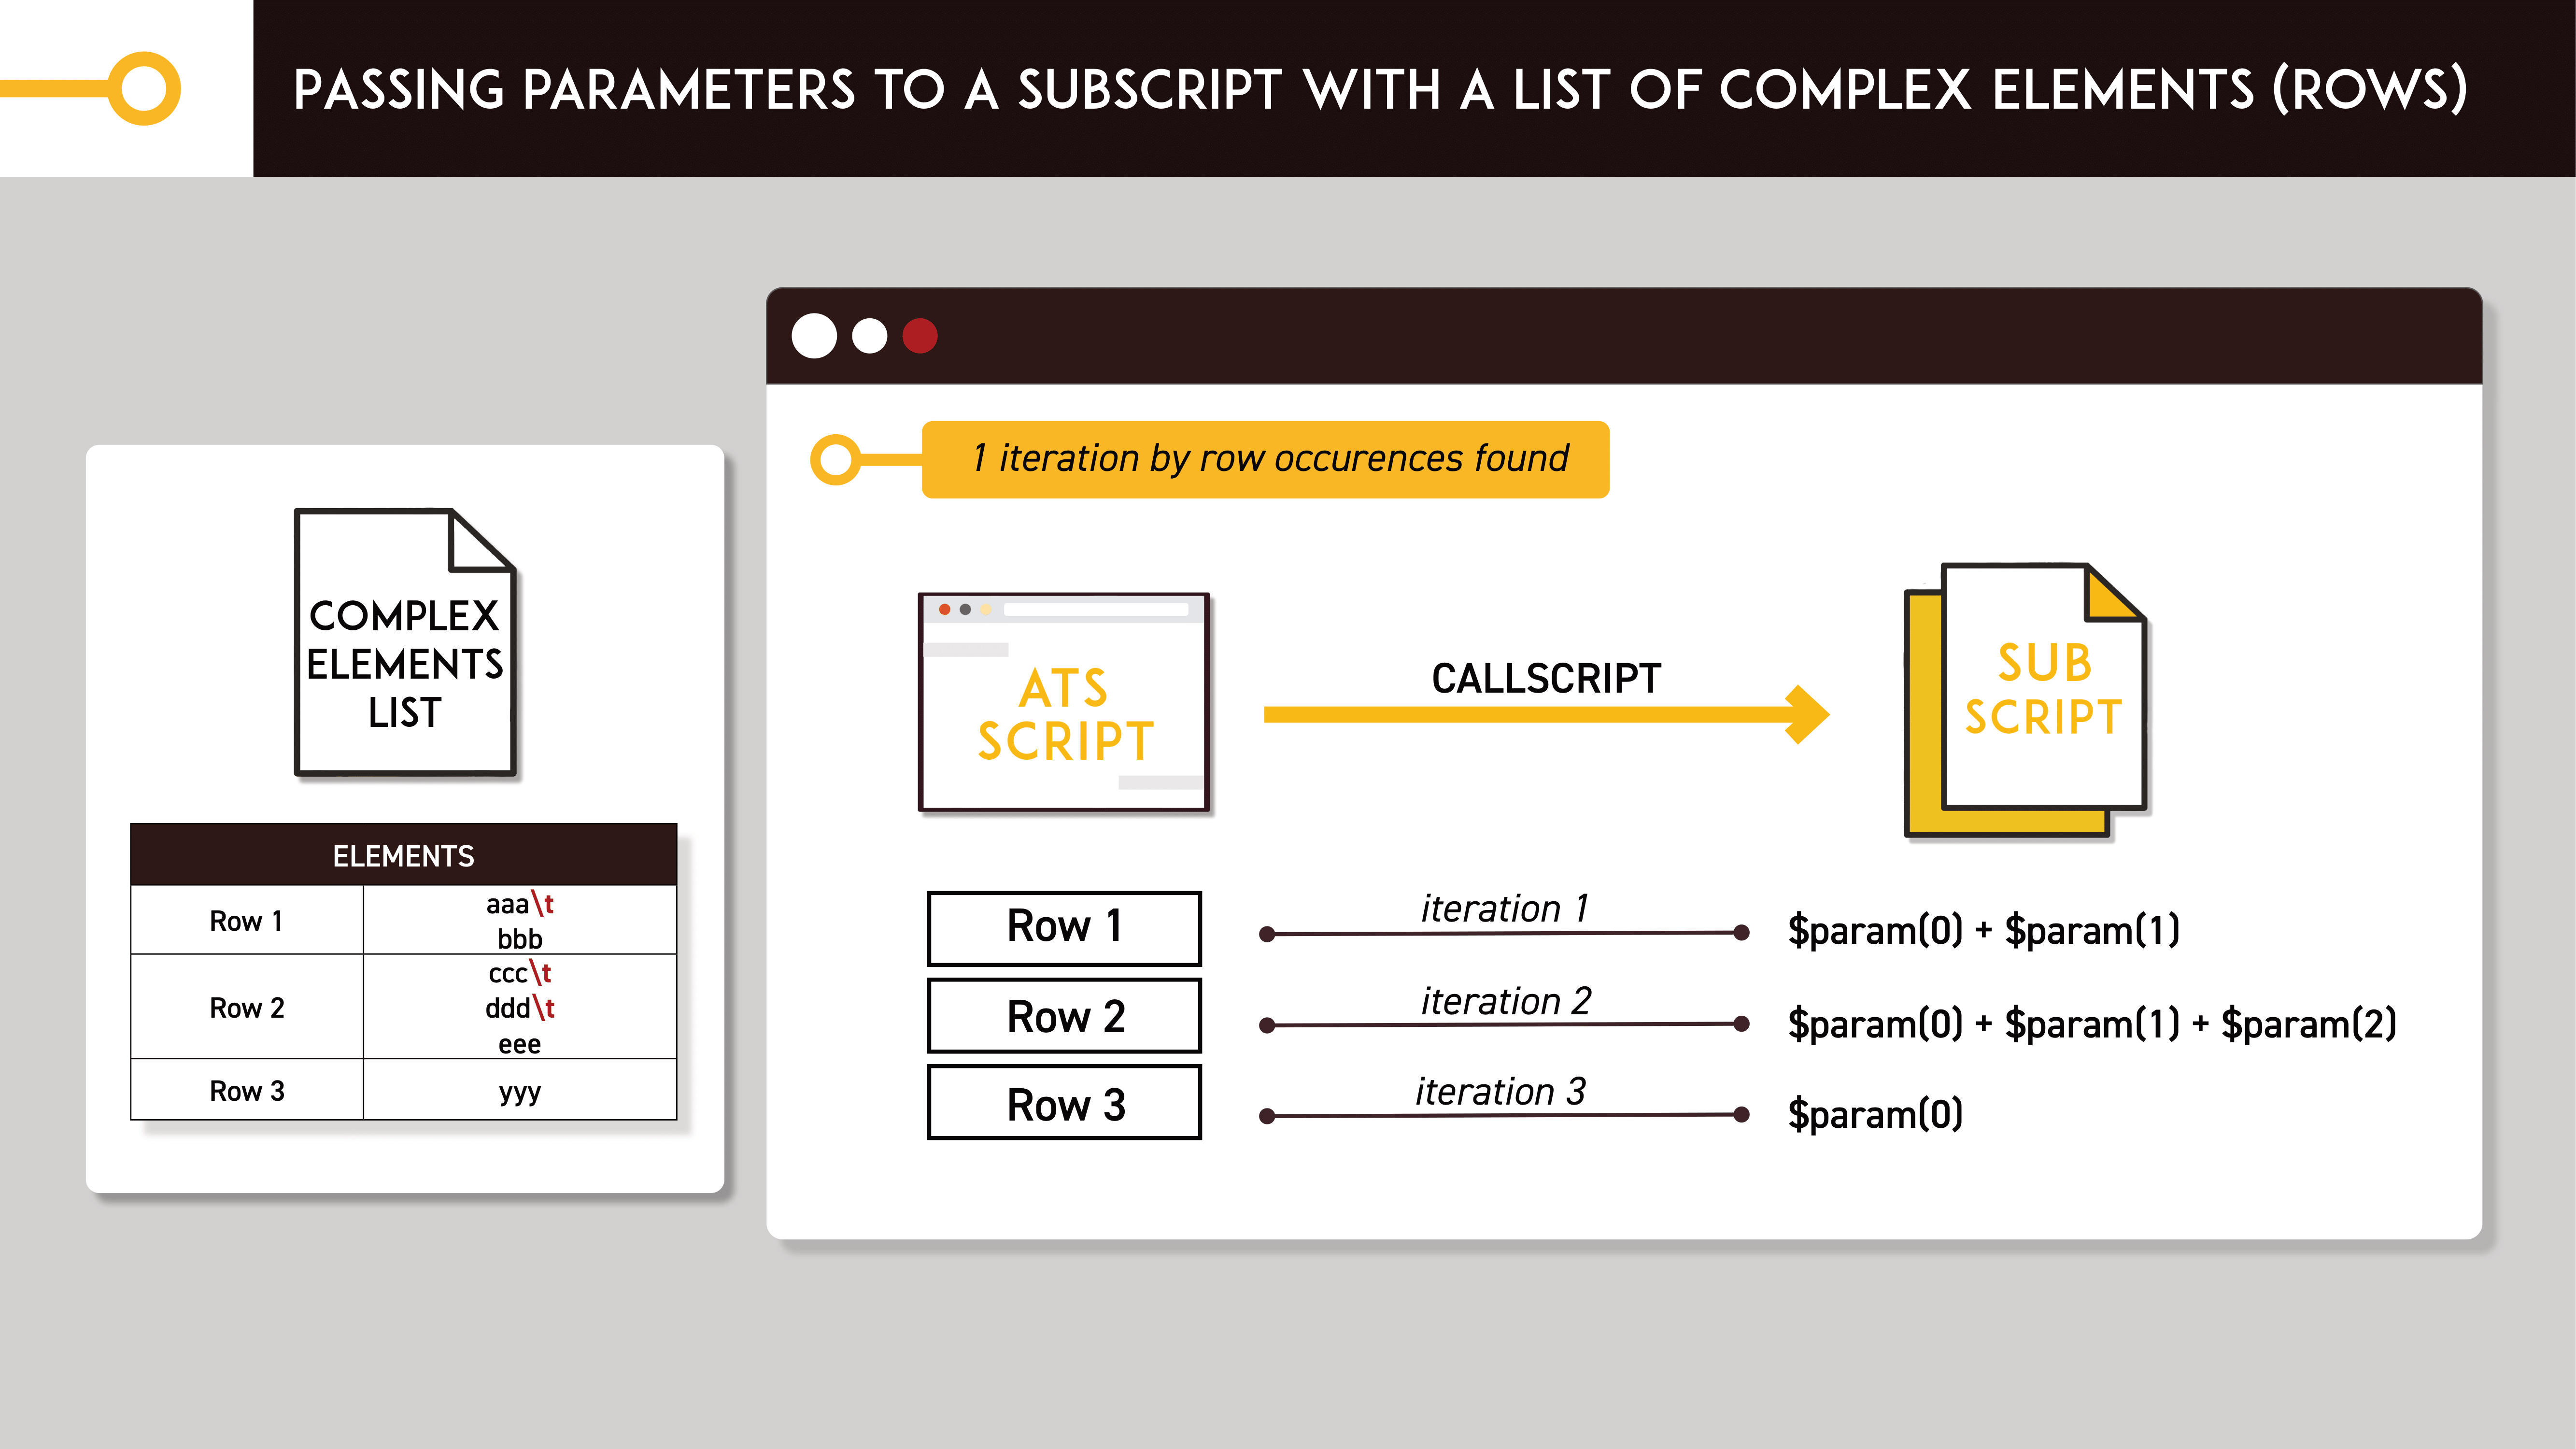
For a complex list of elements (Rows), each row corresponds to an iteration and each separate value of a divided text "\t" corresponds to a parameter. (see the scheme above "Passing parameters to a subscript with a list of complex elements (rows)”)
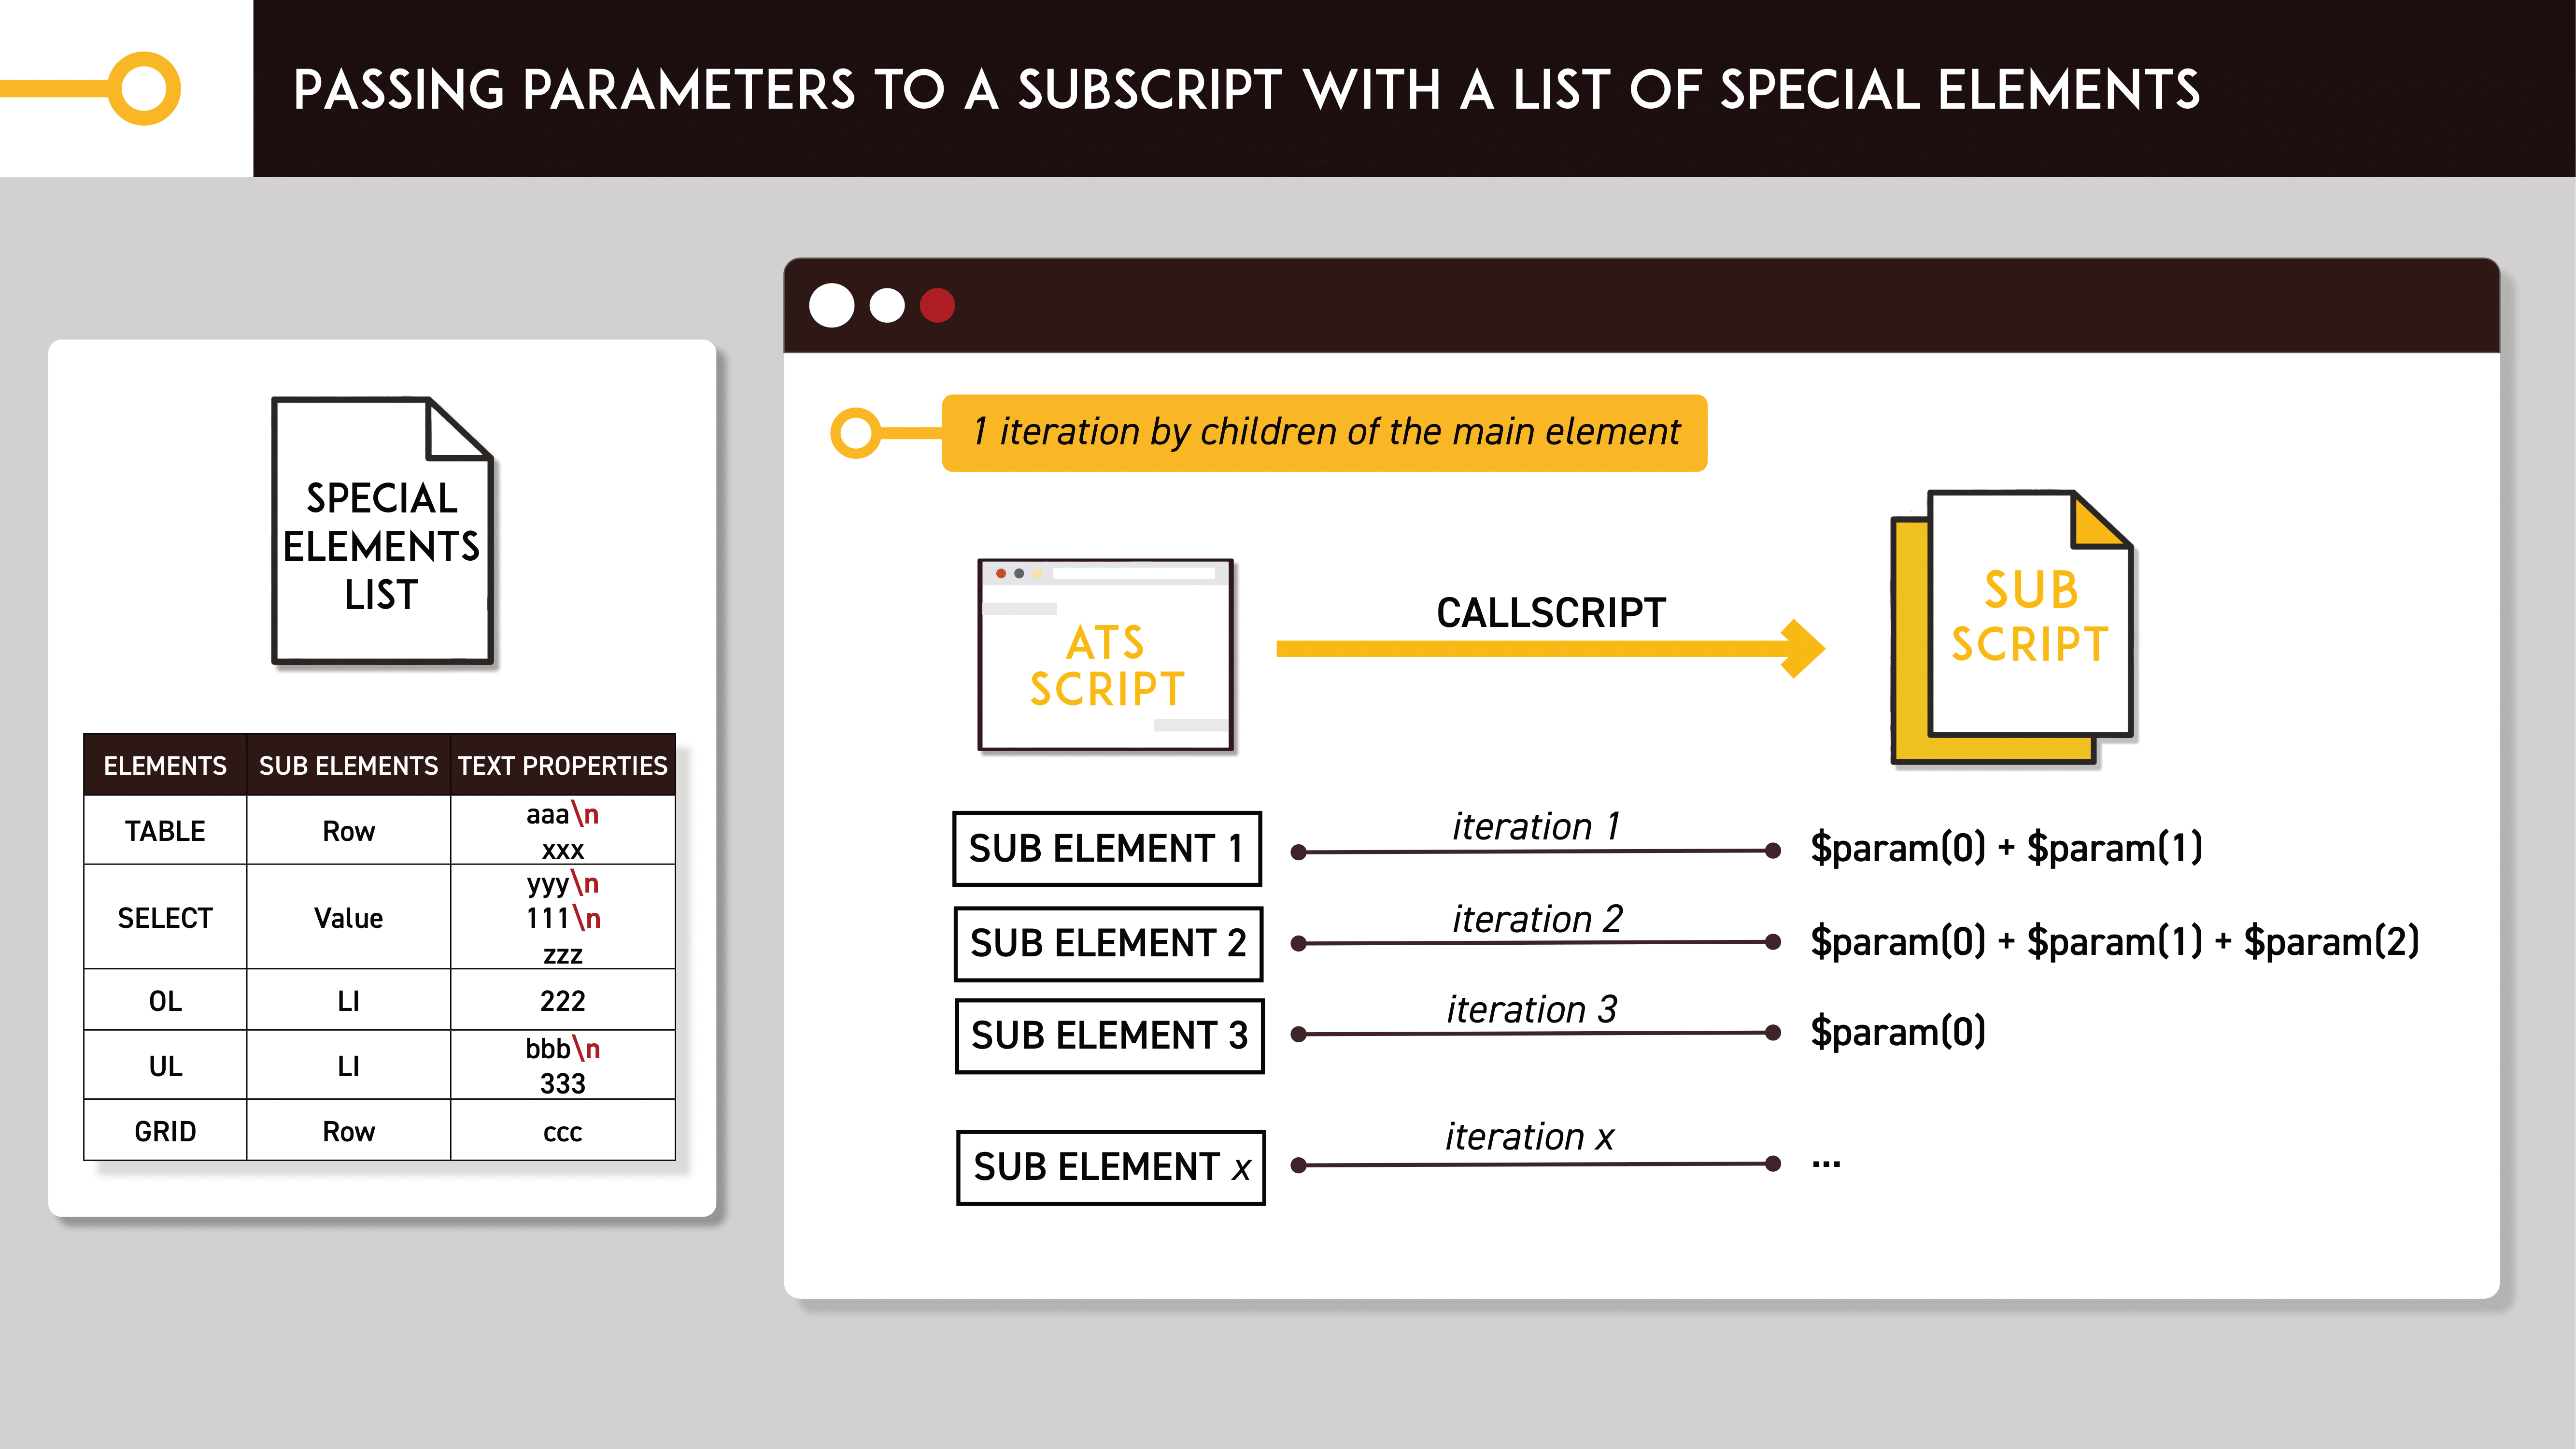
For a list of special elements, each of its elements has sub-elements which themselves have values. The number of iterations is determined by the number of sub-elements and the number of parameters is determined by the separate text property values that make up these sub-elements. (See the scheme above "Passing parameters to a subscript with a list of special elements”)
Convert an EXCEL file as a data file
You can use your Excel files in Agilitest by converting them in data files.
To do that, export your Excel file and convert it into a .csv or .json file.
Once it is done, open your “data” repository of your project from the Windows project explorer.
.png)
Then, copy and paste your data file in the repository.
4. Parameters with data splitter
It is also possible to call a subscript by passing parameters in table form.
To do this, drag a script from your project explorer into your script.
Then click on “data splitter”

This table is composed of data in text format:
.png)
- Either manually entered
- Or with a variable
When passing this data, you can specify a separator character to define rows and columns.
.png)
Enter the character you wish to define as a separator, then add it to your data to perform its function.
Example :
If you enter the “/” character as a column separator
.png)
You add this character to your data where you wish to create a separation
.png)
Then it will display a table with the data separated according to the position of the column separator “/”.
.png)
It is possible to not enter a separator character:
- Erase button
.png)
By creating an empty separator, this will separate all existing characters.
- Cross button
.png)
By creating a null separator, this will not affect the data, which will remain as it is.
Call script action with external scripts
Javascript script
From the project explorer, open the “Javascript ATS scripts” menu
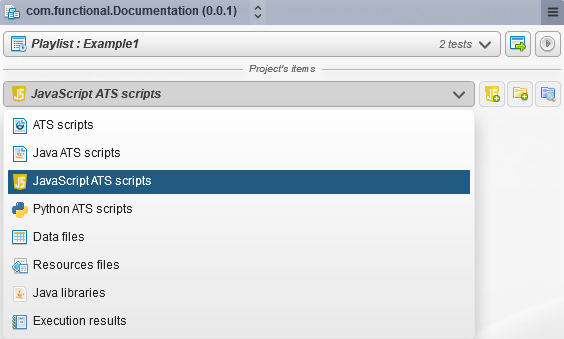
Create a Javascript script and give it a name.
All the information you need to use the elements and parameters can be found directly in your Javascript script.
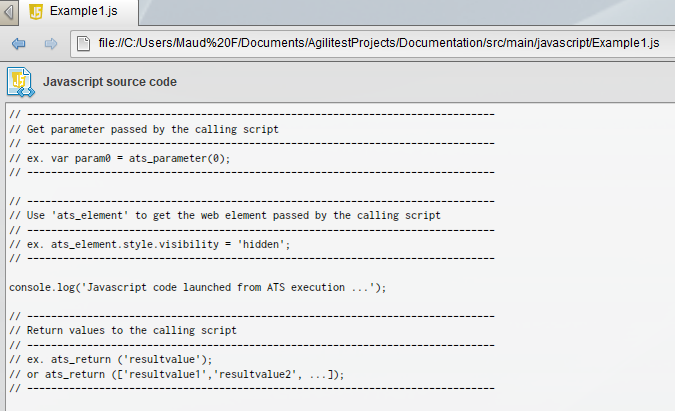
This script is editable from the Agilitest editor.
From your ATS script, drag your Javascript script to create a call script action
.png)
You can retrieve the parameters passed in your Javascript subscript (manuals, data separators, CSV/JSON files).
To do this, you can use the function indicated in the Javascript script, i.e. ats_parameter.
The special feature of the Javascript subscript is that it is possible to pass an element.
To retrieve an element, you can use the variable indicated in the Javascript script, i.e. ats_element
Python script
From the project explorer, open the “Python ATS scripts” menu
.png)
Create a Python script and give it a name.
All the information you need to use the elements and parameters can be found directly in your Javascript script.
.png)
This script is editable from the Agilitest editor.
From your ATS script, drag your Python script to create a call script action.
.png)
You can retrieve the parameters passed in your Python subscript (manuals, data separators, CSV/JSON files).
To do this, you can use the function indicated in the Javascript script, i.e. ats_parameter.
🔸 Warning
Unlike Javascript subscripts, it is not possible to pass an element with a Python subscript.
Parameter execution options
Iterations
Adding iterations will allow your script to be executed multiple times. This is handy when you have a function that can be used successively and will allow you to check your UI behaviors.
Example: The "go back" function to return to previous pages of a web page that can often be repeated several times.
To add iterations to a subscript composed of parameters, click on your subscript call and increase the number of iterations.
.png)
Example: If you add 3 iterations, the subscript and its parameters will be executed 3 times.
Adding iterations allows you to avoid flaky tests, i.e. actions that are executed several times and that will sometimes produce an error for no particular reason.
Iterations, conditions and variables are not always usable depending on the case :
- Executing the subscript from the parameters added from your script will give you access to all available options: iterations, variables and conditions.
- Executing the subscript from a JSON or CSV file will not allow you to use variables or iterations but will allow you to add conditions.
- Executing the subscript with adding the text of an element will allow you to add iterations and conditions but will not give you access to variables.
Passing parent elements
It is possible to pass an element retrieved in a subscript.
From your subscript action, click on “parameter element”.
.png)
Switch to capture mode, then select an element with a parent.
Drag the element into the subscript.
.png)
Once in your subscript action, add an action then click on “application root” then on parameter item.
.png)
You'll find the previously captured element, to which you can add children.
.png)
Return value
It is possible to get data from a subscript. This will create a dynamic (non-modifiable) variable since the return variable will automatically value the variable of the main script.
There are two ways to obtain a returned value:
1. Create a variable
At the very bottom of the subscript is a small yellow arrow allowing you to add a return value.

Once the return variable has been created, it must be retrieved from the script call action.
To do this, click on the "Variables" button to tag it in the main script with an equivalent variable opposite.
.png)
2. Property variable
Create a property action to get data from the interface.
To do that, click on “Property” in the action menu

The property action will target an interface element.
For that, click on the “Load” button in the property action
%2520(1).png)
It will load all the properties that are associated with this element.
Click on the property you are interested in to have it loaded during the execution.
.png)
These properties correspond to the attributes of the element that are found in the "Captured Element's Parents" window when the element is captured.
ATS properties also appear in the list of properties as well as formatting elements (CSS).
When a property is selected, it will be placed in a variable that will take the value of the selected property.
.png)
Example: If you select the property "text" with the value "Hello world - Wikipedia" in the list of captured properties.
.png)
Once the value is created from the property, you can return it.
Click on the "Add a return value" button
.png)
Then, open the special values menu and select in the script variables the one that corresponds to the property variable
%2520(1).png)
Click on the sub-script call action, then on "Variables" to specify that a value is returned from the subscript.
.png)
Select the variable that will store this return value from one already created or you can also create a new one.
.png)
This means that the return value of the sub-script will be retrieved from the variables of the main script.
This allows to pass data between a script and its sub-scripts.
📙 To know more

The main script calls a subscript that contains values. It is possible to pass parameters to this subscript and it is also possible to return the values from the sub-script to the main script. With the return value action, you can call a number of values that will be returned based on the values in the subscript. Sometimes the information sent (parameters or return values) is not expected and therefore not processed.


